spoon
Showing posts with label WW PointsPlus Friendly. Show all posts

Zucchini Recipe Round-up

1

Category: , , ,

It's zucchini-palooza around here these days! It seems like every other day I find a monster. You know the ones I'm talking about, somehow it wasn't visible yesterday and today it's the size of a baseball bat! I've been searching my yellow squash plant for the monsters as well, but it's funny how things work out sometimes. We have so many zucchini and haven't picked any yellow squash, yet my sister is the complete opposite with a lot of yellow squash and a dying zucchini plant.


For ease, we generally eat the zucchini grilled, roasted or stuffed, but that can only happen so many times before it becomes boring. Have no fear, since I haven't posted anything new in months, I figured I'd at least share with you my favorite savory and sweet zucchini/summer squash recipes to keep things far from boring!

Zucchini Cornbread
Shaved Summer Squash with Prosciutto and Goat Cheese
Zucchini Corn Fritters
Turkey Burger Pitas with Tzatziki
Harvest Muffins
Foil Packet Summer Squash
Here are some friends' recipes that I've made and recommend as well:

Chocolate Zucchini Bread from Alida's Kitchen

Pineapple Zucchini Bread from Sweet Beginnings

Pasta with Zucchini Cream Sauce from The Way the Cookie Crumbles

Black Bean Roasted Zucchini Goat Cheese Enchiladas from The Way the Cookie Crumbles

If you don't get around to making these now, shred that zucchini and freeze it so you can make these yummy treats in the dead of winter!

Stuffed Cabbage and Peppers

1

Category: , , , , ,

Now that Fall is here, we've switched from lighter grilled meals to heartier stovetop meals. What I love about Stuffed Cabbage and Peppers is, while it's a one-pot, hearty, stovetop meal, it's still on the lighter side. 


I have 2 stuffed cabbage recipes that I normally make. This one loosely resembles the recipe made by my mother as far back as I can remember. I don't know her measurements (there probably aren't any), nor do I know her exact ingredients, but I do remember piling all the wrapped cabbage and stuffed peppers in a pot, adding potatoes and covering them all with tomatoes. I took that memory and created a recipe around it and this is what I came up with. Enjoy!

Here is what you'll need:
  • 7 outer cabbage leaves
  • 3 cubanelle peppers
  • 1 lb. ground sirloin
  • 1 tsp oregano 
  • salt and pepper
  • 1 egg
  • 1 Tbsp Worcestershire sauce
  • 1/4 cup bread crumbs (or minute rice)
  • 1/4 large onion, finely diced
  • 1/4 head of cabbage, chopped
  • 1 cubanelle pepper, diced
  • 8 small potatoes, halved or quartered
  • 8 small tomatoes, quartered
  • 8 oz. tomato sauce
  • 1 Tbsp brown sugar
  • 2 garlic cloves, minced
Fill a large pot with water and boil the 7 outer cabbage leaves until they are softened and partially cooked. Drain and set aside.

Hollow out 3 cubanelle peppers by cutting a circle around the stem and emptying out the seeds. Set aside.

In a mixing bowl add ground sirloin, oregano, salt, pepper, egg, Worcestershire, bread crumbs and onion. Combine until just mixed. Divide meat mixture into 10 portions.

Wrap 1 portion of meat mixture inside each of the cabbage leaves as if you were making a burrito. Stuff the remaining portions of meat into each of the cubanelle peppers.

Place wrapped cabbage and stuffed peppers in a large pot. Add chopped cabbage, diced pepper, potatoes, and tomatoes to the pot.

In a small bowl, combine tomato sauce, brown sugar and garlic. Mix well and pour over all ingredients in the pot. Cover.

Turn stove to medium/medium-high heat until the liquid begins to boil. Reduce heat to medium and simmer for about 35-45 minutes, or until meat is cooked through and potatoes are tender. Serves 4-5.
Source: Adventures In My Kitchen Original

Turkey Burger Pitas with Tzatziki

2

Category: , , ,

Greek food is pretty high up on my list of favorites. I'm known for ordering a gyro platter (gyro, Greek salad and fries or soup) at our neighborhood pizza joint. When I saw these burgers pop up on A Taste of Home Cooking I knew they needed to make an appearance on our meal plan.


While this recipe looks like a lot of work, this meal came together fairly quickly. I made the tzatziki and while it was chilling I made the burgers, cooked them and assembled dinner. You could also make the components the night before or morning of, which I love to do in order to make dinnertime more manageable.

The tzatziki really makes this meal great! The burgers were really juicy due to the zucchini, but I think next time I'll add some oregano and possibly feta to bump up their flavor a bit. If you like Greek food, these are well worth putting on your weekly meal plan!

For the Tzatziki:
  • 1/2 English Cucumber, peeled, seeded and finely diced
  • 12 oz Greek yogurt
  • 1 garlic cloves, minced
  • 1 tsp white wine vinegar
  • 1 tsp olive oil 
  • 1 tsp lemon juice
  • salt and pepper to taste
Mix all ingredients in a small mixing bowl. Refrigerate for 30 minutes or longer.

For the Burgers:
  • 3/4 lb ground turkey
  • 1 small zucchini, shredded
  • 1/4 small onion, shredded
  • 1 Tbsp cilantro
  • salt pepper
  • 2 tsp olive oil
Mix all ingredients in a large mixing bowl. Divide into 8 portions, and form each portion into a mini burger about 1-1/2 inch thick.

Preheat a small frying pan over medium-high heat. Add burgers to the pan and cook for about 6 minutes. Flip and cook on second side for another 5-6 minutes.

To Serve:
  • 2 pita with pockets, cut in half
  • 1/2 English cucumber, sliced thinly
  • 1 small tomato, sliced thinly
  • 1/2 onion, sliced thinly
Place cucumber, tomato and onion slices in a pita half. Add 2 burgers and top with tzatziki.

Serves: 4, 2 mini burgers each

Source: Adapted from Weight Watchers as seen on A Taste of Home Cooking

Mango Passion Fruit Glazed Chicken Skewers

1

Category: , ,

Do you ever buy something, try it and think, "meh." Then a few days later you catch yourself grabbing for it thinking, "it wasn't that bad." That is until you are eating it and thinking, "I paid $3 for this, there is no way I am throwing this away." Who's with me?

I hate waste, and I've mentioned before that I'm really trying to cut down on it. One thing I'm learning is that if I stick to cooking staples, I'm better off. However, I've mentioned before I have an obsession with jelly and jams. Whenever I see a unique flavor I have to pick it up. More ofthen than not I like it, however, once in awhile something comes along that just isn't pleasing to my palate.

Enter mango passion fruit fruit spread. It sounds good, but it's not. I've tried it several times thinking, "it wasn't that bad" and after tasting it I remember, "meh." Thanks to Branny Boils Over, I found a way to use up those "meh" jelly and jams that really isn't that bad!

These chicken skewers were super simple and have a lot of palate-pleasing flavor. I was a little apprehensive about rosemary with these flavors, but it worked so I'm thinking you could substitute with just about any flavor jelly/jam/fruit spread. If you're apprehensive about the rosemary, go ahead and use another herb in it's place.

Here is what you'll need:
  • 2 springs fresh rosemary, divided
  • 1 tsp brown sugar
  • salt and pepper 
  • 1/4 tsp crushed red pepper flakes
  • 2 boneless, skinless chicken breasts, trimmed of excess fat and cut into 1-inch cubes
  • 1/2 cup mango passion fruit fruit spread
  • 2 tsp soy sauce
  • 2 tsp white wine vinegar 
  • oil for the grill
Combine 1 sprig of rosemary, brown sugar, salt, pepper and red pepper flakes in a mixing bowl. Add the chicken cubes and mix well to coat all the pieces.

Place chicken on skewers and allow to marinate 30 minutes.

Preheat grill to medium-high heat.

Just before grilling, combine remaining rosemary, fruit spread, soy sauce and vinegar in a small saucepan. Heat over medium-low heat until well combined and thinned out. Set aside. (You could even heat this on the grill while the chicken is cooking).

Brush a little oil on the grill grate to help prevent the chicken from sticking. Place the chicken skewers on the grill and cook for about 3-5 minutes per side until browned. Turn skewers every 3-5 minutes until 3 sides are browned. When the last side is browning, use a pastry brush to coat the kabobs with the fruit glaze.

Total cooking time is about 12-14 minutes. Serves 2.

Source: Adapted from Fine Cooking via Branny Boils Over

Grilled Beef Kebabs

1

Category: , , ,

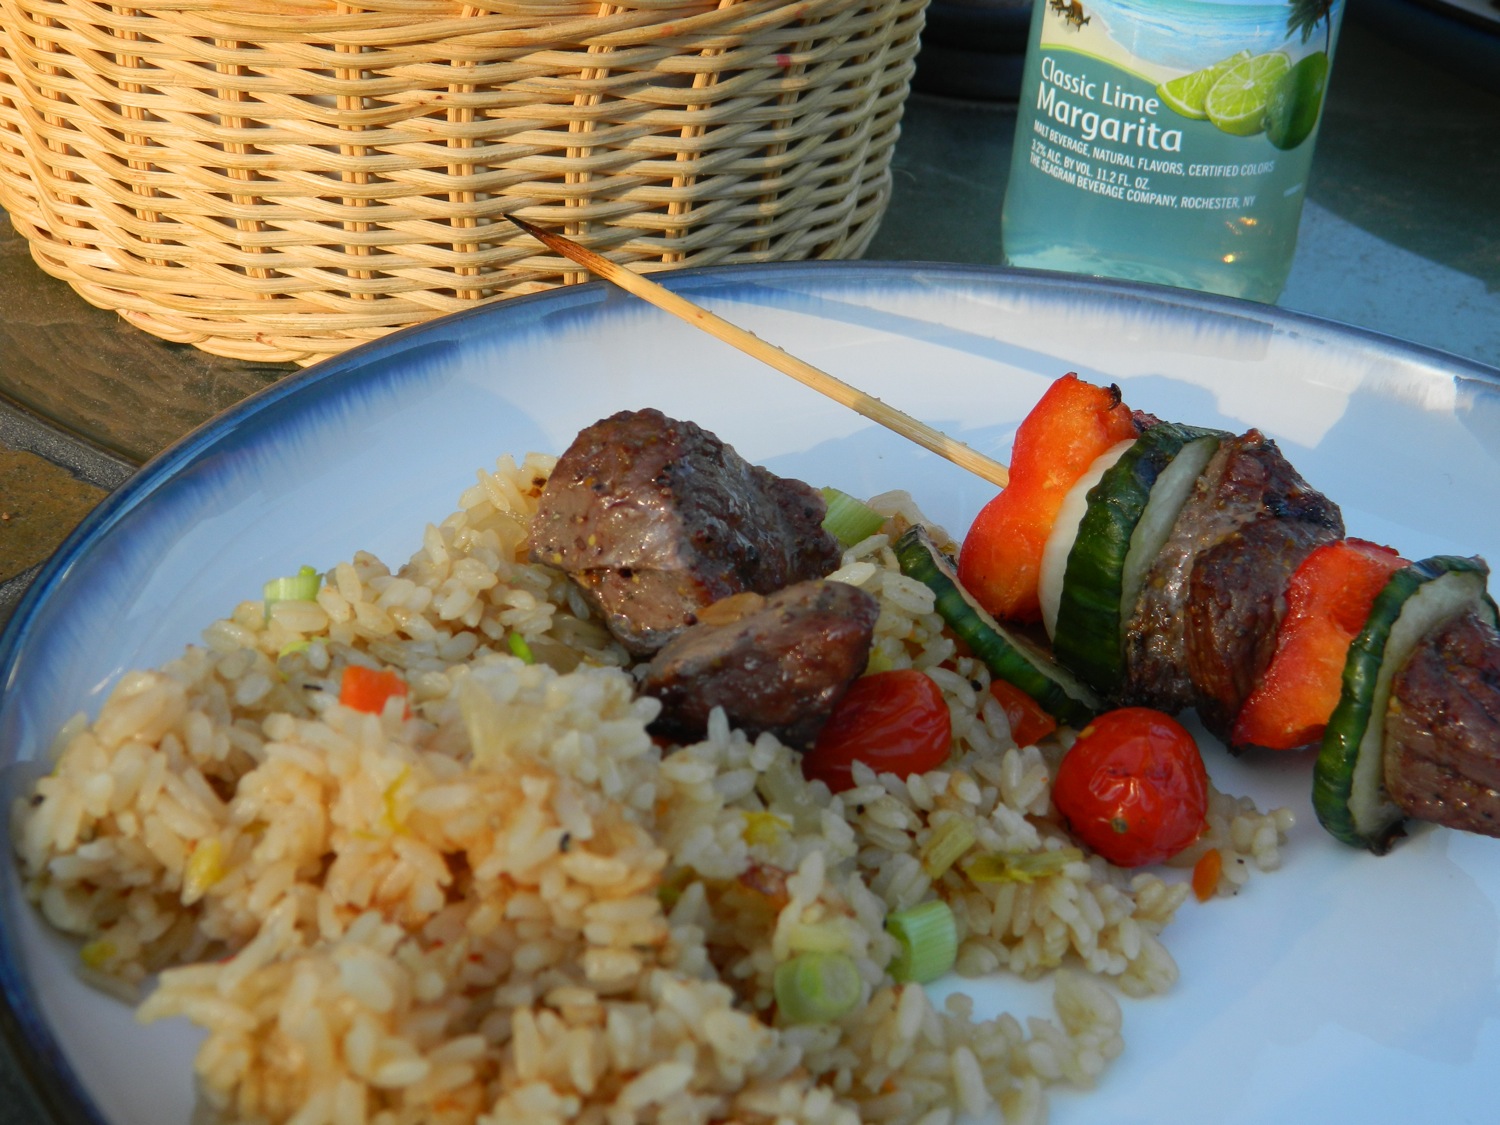
I think I'm over my dinner rut. Making use of the crockpot helped me out of it, and now the grill is helping me stay out of it. Oh how I love to grill! Not only does the food taste great, it help keep the house cooler and reduces the amount of dishes to wash. Score (especially on that last one)!


So many days when I get home from work I really don't feel like cooking, but I find when I do some prep in the morning it doesn't feel so overwhelming when dinner time comes.  This recipe is a perfect example. And to make it even better, the kebabs magically skewered themselves while I was at work.

Here is what you'll need:

  • 2 tsp grainy mustard
  • 1 tsp crushed garlic
  • 1 Tbsp Worcestershire sauce
  • 2 tsp olive oil
  • 2 tsp steak seasoning
  • salt and pepper to taste
  • 1 1/2 pounds of cubed beef (I used stew meat)
  • Cubed vegetables of your choice (we used onions, peppers, cucumbers and tomatoes)

Place all the ingredients in a medium container with a cover. Shake to mix. Open cover and add the meat.
Shake to coat meat.

Place container in the refrigerator to allow the meat to marinate for at least 1 hour (I left there all day while I was at work).

Place meat and vegetables alternately on skewers.*

Place skewers on a preheated grill and cook on high heat until meat is cooked to your liking. Serves 6.

Source: Adventures in my Kitchen original

*I used wooden skewers. I placed the wooden skewers in a dish of water before I left for work so they could soak all day. This prevents them from burning and disintegrating while cooking on the grill.

Goat Cheese Stuffed Pork Chops

1

Category: ,

I'm trying to get better at keeping things simple on weeknight. I was starting to loose interest in cooking during the week, and I realized the problem is that I tend to complicate things. Since my husband is just as happy eating a sandwich as a multi-course meal, I realized I should make things a little easier on myself. Here is a great example which was inspired by Melissa's Fig & Gorgonzola Stuff Pork Chops.


With a few simple ingredients, I had 1/2 of our meal packed with flavor and ready within minutes. The side I served was not so simple, and not that great, so I'll spare you those details. This is really more of a method than a recipe, just take a look at what you have on hand and go from there.

Here is what you'll need:
  • 2 thick pork chops
  • 2 oz honey goat cheese (or any type of cheese)
  • 3 tsp dried cranberries (or any type of dried fruit)
  • salt and pepper
  • olive oil  
Slice pork chops horizontally, cutting almost all the way through but being careful to leave them in 1 piece.

Stuff each pork chop with 1 oz goat cheese and 1 1/2 tsp dried cranberries. Salt and pepper the outside of the pork chops.

Heat olive oil in a pan over medium-high heat. Place pork chops in the pan and let cook 5-7 minutes until browned. Flip over and cook another 4-6 minutes until browned and cooked through.
    Source: Inspired by I Was Born to Cook

    Product Review and Giveaway: Over the Moon Milks

    5

    Category: ,

    Recently I was chosen by Over the Moon Milks to review their products. I was pretty excited to be chosen because this is my first product review, and since I've already purchased this product many times I knew I could share a positive review (is this cheating?)! The only sad part about this post is that my store only had 1 type, the 1% Low-Fat Milk. Oh how I wish they had the Chocolate Fat Free Milk in stock!


    I must confess, I'm not a very big fan of milk. However, I've purchased Over the Moon Milks several times and I'm drawn to their brand because frankly, it just tastes better to me than other brands. My favorite is their 1% Low-Fat Milk, and a close second is their Chocolate Fat Free Milk (let's be honest, this is actually my favorite, but I buy it less often!).

    What are some other reasons why I love Over the Moon Milks?
    1. They contain more calcium than whole milk (400 mg per cup!)
    2. They contain more protein than whole milk (11 g per cup!)
    3. I find they taste creamier than other brands of the same type
    4. I find they stay fresh longer than other brands
    5. Their packaging; I love the carton and screw cap (vs. plastic and pop top)
    Now for the giveaway. Over the Moon Milks has generously offered to give 3 readers of mine an Over the Moon sipper cup! 


    You have 3 chances to enter:
    1. Leave a comment letting me know your favorite type of milk
    2. Leave a comment below that you "Like" us on Facebook
    3. Leave a comment below that you "Like" Over the Moon Milks on Facebook (after you "Like" their page you can download a coupon!) 
     Giveaway Rules: CLOSED
    • No purchase necessary
    • Maximum 3 entries per person, leave a separate comment for each
    • Giveaway ends April 4 at 11:59 PM EDT
    • 3 winners will be selected by a random number generator
    • Winners must supply a valid email address in the comments
    • Winners will be contacted and have 3 days to respond, at which point winner forfeits the prize and another winner will be chosen
    • Winners will provide name, email address, shipping address and phone number which I will supply to the sponsor of the giveaway item
    • Prize can only be shipped to a US address
    Disclosure: I was compensated by Over the Moon Milks in order to buy the product for this review, however, the opinions expressed here are entirely my own.

    One-Pot Rosemary Chicken and White Beans

    4

    Category: , , , , , ,

    When I first scanned the ingredient list of this recipe I immediately knew we would like it. After tweaking the recipe a few times, we LOVE it! One-Pot Rosemary Chicken and White Beans is not only packed with protein, but I've bumped up the produce, for a well balanced dish that comes together in no time. This has quickly become a weeknight go-to meal in our house, and after trying it I can imagine this will easily become a go-to in your house as well.


    This latest version happened accidentally when JR picked up escarole at the store. I'd never cooked with escarole before, however, I'm happy this was an accidental purchase because I have a new love to work with in the kitchen. This is such a simple delicious meal, I hope you'll try it in your kitchen this week. Don't forget to serve it with some crusty bread for dipping!
     
    I'm sending this post out to Jey at The Jey of Cooking in honor of her mom who received a heart transplant almost 1 year ago. Jey, I'm so glad to hear your mom receive a second chance at life! If you'd like to help Jey spread the word about her cause, check out her post here.

    Here is what you'll need:
    • 2 tsp olive oil
    • 1 spring fresh rosemary, chopped
    • salt and pepper
    • 1/2 chicken, cut into 5 pieces (drumstick, thigh, wing and split the breast into 2 pieces)
    • 1 fennel bulb, diced
    • 1 medium onion, diced
    • 1 clove garlic, minced
    • 1/2 cup white wine
    • 28 oz canned plum tomatoes, low-salt or no-salt added preferred
    • 15 oz canned cannellini beans, rinsed
    • 1/2 head escarole, rough chopped
    Heat oil in Dutch oven over medium-high heat. Season chicken with rosemary, salt and pepper. Sear chicken in dutch oven for 3-4 minutes on each side until browned. Remove the skin and move all the chicken pieces to one side of the pot (stack it up if needed).

    Add fennel and onion to the pot, and cook, stirring occasionally, until they begin to soften and brown about 5-8 minutes. Add garlic, stir and cook for 1 minute until fragrant.

    Rearrange chicken to evenly distribute among vegetables in the pot. Add wine to the pot, allow to simmer and scrape bottom of pot with wooden spoon to remove browned bits. Add tomatoes and their juice, and crush with wooden spoons. Add beans, stir and cover. Reduce heat to medium-low and simmer 10-15 minutes.

    Remove cover, add escarole and stir. Cover and allow to cook for 10 minutes. Serves 4.

    Source: Adapted from Cooking Light

    Mahogany Beef Stew

    2

    Category: , , , ,

    Inadvertently, this week ended up being a soup/stew week. I'm really excited to end this week with this stew which part of a recipe swap I participated in. I was lucky enough to get this unique Mahogany Beef Stew submitted by Mary Ellen of Mary Ellen's Cooking Creations. After reading the ingredient list I was intrigued by one ingredient, hoisin sauce.  This is a staple in our house, generally used for a grilled steak marinade, but I never thought about using it in beef stew.


    As I started cooking I realized the directions said simmer on low 2-3 hours (when will I learn to read all the way through before starting!).  After saying something explicit under my breath, I went back to the original recipe on Epicurious. The instructions didn't appear to take as long to cook, so I opted to follow their method. I didn't end up needing cornstarch for thickening, but you may depending on how thick you want the gravy.

    Mary Ellen mentioned serving with mashed potatoes, so I went ahead and served it that way, a first for me. I'm so glad I followed her lead, because the stew gravy was amazing over the potatoes. Even JR said to make sure Mary Ellen knows how much we liked it, so a big shout out goes to Mary Ellen for submitting this recipe!

    For more soup and stews from the recipe swap, be sure to check out A Taste of Home Cooking for an upcoming Recipe Swap Round-up of Soups.

    Here is what you'll need:
    • 2 Tbsp olive oil, divided
    • 1 onion, sliced
    • 8 oz mushrooms, sliced
    • 1 lb stew meat
    • 2 tsp flour
    • 1/8 tsp crushed red pepper flakes
    • salt and pepper
    • 1 cup red wine, divided (I used Malbec)
    • 17 oz chopped tomatoes
    • 3 oz hoisin sauce
    • 3 carrots, cut into rounds
    • 1/2 cup beef stock
    In a Dutch oven over medium-high heat, add 1 Tbsp olive oil, onions, mushrooms and bay leaf. Season with pepper, and saute 8-10 minutes. Stirring occasionally.

    Season stew meat with flour, salt, pepper, and red pepper. Heat a medium skillet over high heat, add 1 Tbsp olive oil and meat. Sear meat on all sides until browned.

    Add meat to Dutch oven. Pour 1/4 cup red wine to skillet, simmer and stir to remove brown bits from pan. Pour wine into Dutch oven.

    Add 1/4 cup wine, tomatoes and hoisin sauce to Dutch oven. Stir well, cover and turn heat to low. Simmer on low heat 45 minutes, stirring every 15 minutes.

    Add carrots, remaining wine and stock to Dutch oven. Turn to medium and bring to boil. Cover and cook for 20-30 minutes until carrots are tender. Simmer uncovered another 15 minutes to thicken. Allow to sit for 10 minutes before serving. Serves 4.

    Source: Epicurious as seen on Mary Ellen's Cooking Creations

    Making Stock in the Crockpot

    1

    Category: , , , , , ,

    I mentioned a few weeks ago that I haven't always been so good about keeping waste to a minimum, and the truth is I still sometimes struggle with it, but more recently I've challenged myself to use the ingredients I have on hand.  I'm pretty proud of the fact that I very rarely throw away food these days!

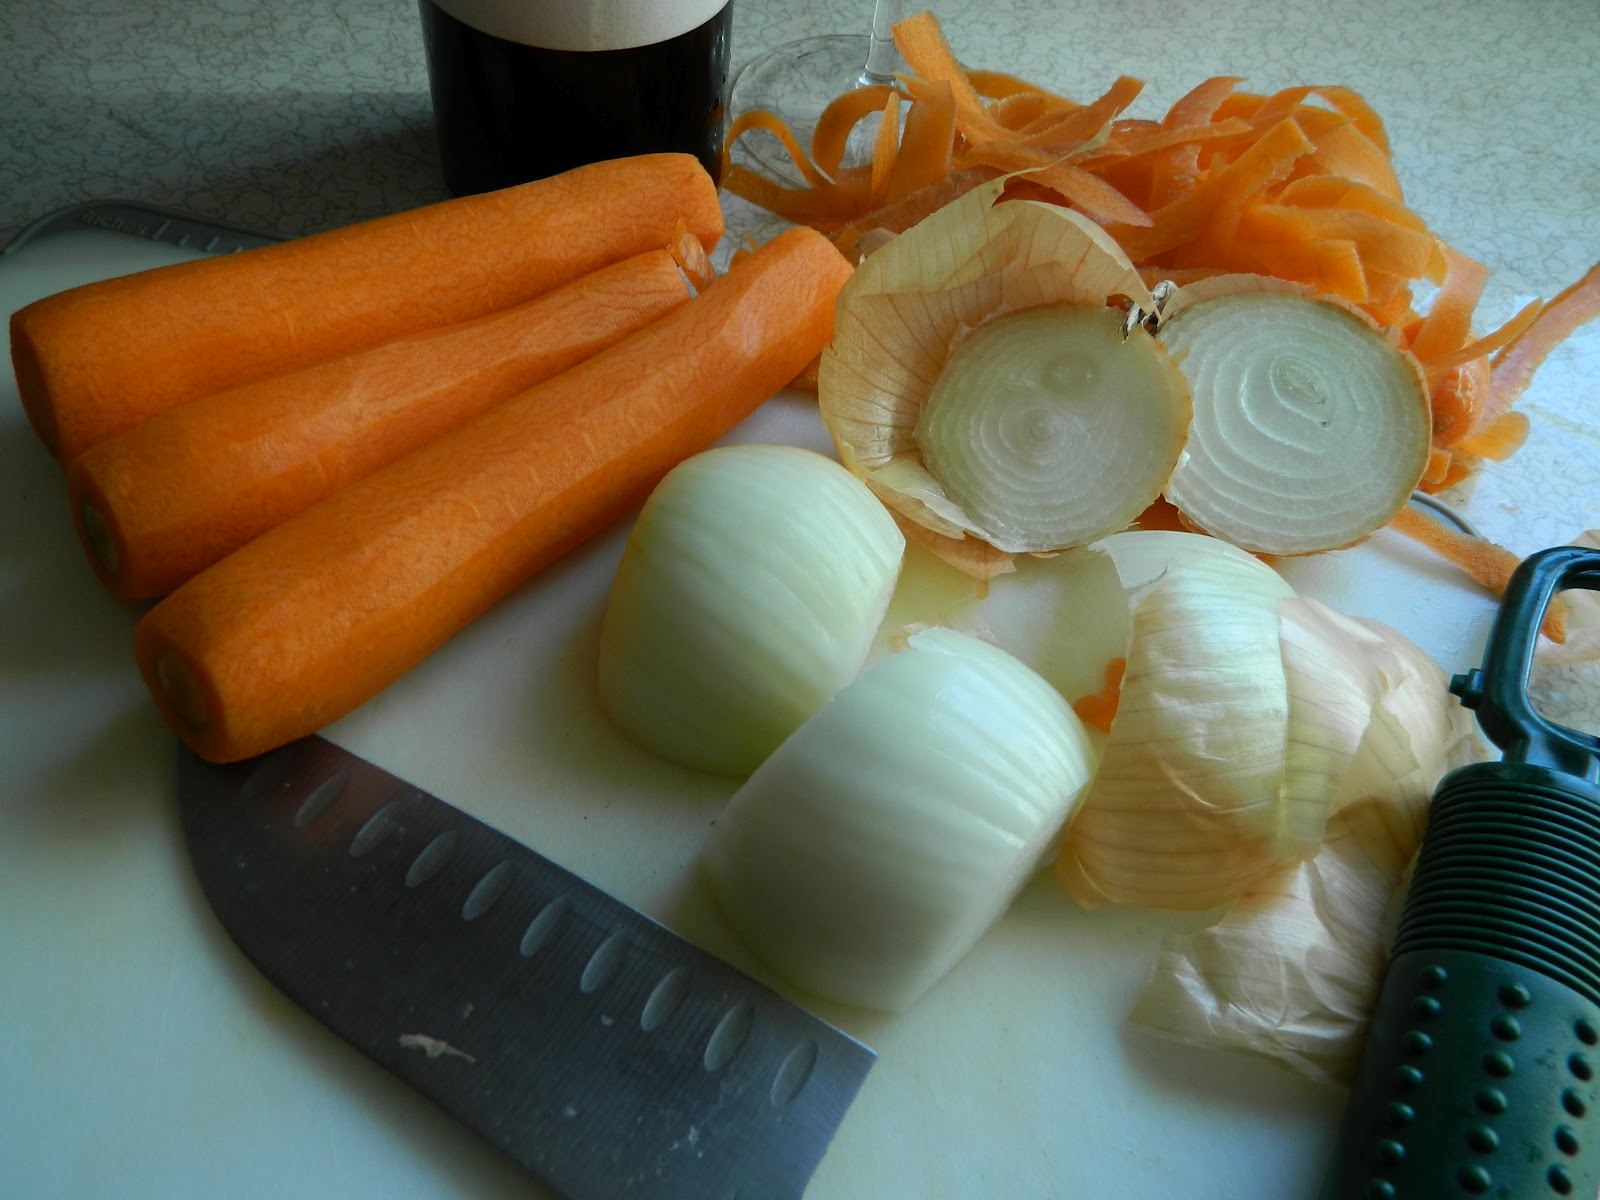
    Remember my Chicken Noodle Soup post? This is one example of where it starts. All the vegetable scraps (ends and peels from the onions and carrots, and root of the celery bunch) go into quart size Ziploc bags in the freezer. When I have about 4 full frozen bags, I get to making stock.


    I hope you aren't rolling your eyes thinking I'm a weirdo! This can truly be life changing. I can't remember the last time I bought stock, since I make it now and it's basically free. Think about how often you buy stock. If you follow this method you will never have to buy it again, and you will save yourself and your family from a bunch of sodium and additives.


    I don't have a precise recipe, but here is the basic method I use for a 7-quart crockpot:

    • Vegetable and Herb Scraps (4 quart size Ziplock bags): carrots, celery, onions, scallions, garlic, leeks, fennel, parsley, thyme
    • Other: 2 dried bay leaves, 1 tsp peppercorns 
    • For Chicken Stock: chicken carcass
    • For Beef Stock: ~2 lbs beef bones (the butcher will give these to you for free)
    Place frozen vegetable and herb scraps in crockpot. If making Chicken or Beef Stock, add the bones now too. Add 2 dried bay leaves and 1 tsp black peppercorns. Fill crockpot with water. Cook on low 10 hours.

    When crockpot turns off, strain stock through fine mesh colander. Allow to cook for 20-30 minutes.  Divide stock into 1 or 1 1/2 cup portions and freeze.

    Makes about ~12-14 cups of stock.

    Chicken Noodle Soup

    3

    Category: , , , ,

    I'll be honest here and tell you that my go-to soup for years came from a can. That's not the case anymore. If only I had realized that I could have a more flavorful homemade version within 30 minutes I may have cut back eating the canned stuff years ago. If this soup is on my weekly menu, I'll chop the vegetables on the weekend or in the morning before work. This helps keep the prep time to a minimum.


    I've played around with the broth ratios and 1/2 stock with 1/2 bullion is my preference, but you could certainly use a ratio of more stock or more bullion based on your preference. I've also tried adding the vegetables to the broth raw vs. sauteing, and sauteing wins hands down. It gives the soup an incredible amount of flavor. I should mention that I like a chunkier soup with less broth, so if you want it soupier just increase the total amount of broth by a few cups.

    Why should you believe this soup is a winner? Well, my non-vegetable eating brother-in-law eats it, the whole thing, including the vegetables (although I do omit the celery if I'm making it for this picky-eating family). So if you have a picky eater, maybe you should give this a try.

    Here is what you'll need:
    • 1 Tbsp olive oil
    • 2 small onions, peeled and chopped
    • 4 carrots, peeled and chopped
    • 2 large outer celery stalks, chopped
    • 2 small inner celery stalks with leaves, chopped
    • 1 dried bay leaf
    • salt and pepper to taste
    • 1 lb chicken breast, chopped
    • 3 medium potatoes, peeled and chopped
    • 3 cups homemade chicken stock
    • 3 chicken bullion cubes
    • 3 cups water
    • 4 oz egg noodles (or 4-8 oz pasta of your choice, including tortellini)
    In a medium size pot, heat olive oil over medium-high heat. Add onion, carrot, celery and bay.  Salt and pepper to taste and saute until vegetables start to brown and onions become translucent. Add chicken and cook until no longer pink.

    Add potatoes, stock, bullion, and water. Bring to a gentle boil for 15-20 minutes until potatoes are cooked through.

    Meanwhile, in another medium pot, boil egg noodles in salted water for 8 minutes or longer to your preferred texture.

    Add noodles to soup or serve soup over noodles if you want to keep the noodles separate for leftovers. Serves 4.

    Source: An Adventures in My Kitchen Original

    Chunky Sloppy Joes on Garlic Toast

    2

    Category: , , , ,

    I've been a terrible blogger the last few months, and it's time I make up for it.  The next few posts are "make-up" posts so to speak.  They've been sitting in my drafts, staring at me to finish them up.

    I didn't realize how similar this recipe was to Stuffed Pepper Soup until I was in the middle of cooking.  It's rare that I put such similar recipes on the same week's meal plan.  Now that I think about it, we ate a lot of beef that week which is also rare.  There seemed to be a lot of rarity going on, because JR also suggest we have Sloppy Joes (they were already on the meal plan!) on Garlic Toast. 


    Hmm, Garlic Toast.  What a fantastic idea!  JR just brought Sloppy Joes to a whole new level, perfect for enjoying while watching the MLB playoffs (see, I told you the drafts have been sitting a while!).  These would also be perfect for the Super Bowl.

    I should note that JR also asked for chunky Sloppy Joes, so my peppers and onions weren't chopped as small as I normally would.  It totally up to you how large or small you chop them.

    I hope you'll try these and let me know what you think of serving them on Garlic Toast!

    Here is what you'll need:
    • 1 tablespoon extra-virgin olive oil, 1 turn of the pan
    • 1 lbs ground beef sirloin
    • 2 Tbsp brown sugar
    • 1 Tbsp steak seasoning blend, I used McCormick's Montreal Seasoning
    • 1 large onion, chopped
    • 1 large red bell pepper, chopped
    • 1 Tbsp red wine vinegar
    • 1 Tbsp Worcestershire sauce
    • 2 cups tomato sauce
    • 2 Tbsp tomato paste
    For the Filling: In a large skillet heat olive oil over medium-high heat. Add meat and break it up with a wooden spoon.

    Combine brown sugar and steak seasoning in a small bowl.  Add mixture to meat and stir to combine.  Continue cooking the meat until it is no longer pink and beginning to brown.

    Add onion and peppers to the skillet and cook for 1 minute.  Reduce heat to medium, add vinegar and Worcestershire and combine well.  Cook for 5 minutes, stirring occasionally.

    Add tomato sauce and paste and combine well.  Reduce heat to medium-low and simmer 5 minutes.

    For the Garlic Toast: While the filling is simmering for the last 5 minutes, spread a thin layer of butter on the rolls, then spread a thin layer of mayonnaise over the butter.  Sprinkle with garlic powder (I used about 1/2 tsp per roll, but this should be adjusted to your taste).  Toast in the toaster oven until browned to your liking.

    Serves 6.

    Source: Rachael Ray

    Cranberry Sauce (All Natural, Sweetened with Agave Nectar)

    0

    Category: , , ,

    Can you believe Thanksgiving is this week?!  I say this every year, but this year really has flown by!  I'm sure you already have your Thanksgiving menu finalized and are knee-deep in prep for the feast.  However, just in case you are still looking for one last side dish, or forgot to pick up the canned cousin, I wanted to share this Cranberry Sauce I made for our Thanksgiving dinner.


    When I first started making Cranberry Sauce, I used a ton of sugar as indicated in most recipes.  After a few years I started using Splenda to save calories, and this year I challenged myself to make it all natural with agave nectar.  I did a quick search and came upon this recipe from Amy Andrews and decided to give it a try.  Not only did it use agave nectar, I was intrigued by it's use of spices.  Speaking of spices, I had no cheesecloth, so I opted to try my tea ball.  It worked.

    This resulted in a less sweet, a little spicy and mighty tasty version of a classic Cranberry Sauce.  Since I'm the only one who eats it, I'm excited to dig into the leftovers mixed in my yogurt and spread on bagels with cream cheese!  If you have ideas for other ways to use up the leftovers, please leave me a comment with your suggestions.

    Here is what you'll need:
    • 1 12 ounce bag fresh, whole cranberries
    • 2/3 cup agave nectar
    • grated peel of 2 clementines
    • 1/3 cup clementine juice
    • 1 cinnamon stick
    • 6 black peppercorns
    • 4 whole cloves
    • 3 whole allspice
    Place cranberries, agave nectar, grated peel, juice and cinnamon stick in a medium nonreactive saucepan.  Stir to combine.

    Place remaining spices in cheesecloth (or a tea ball!), tie the cheesecloth and place in saucepan.

    Bring to a boil over medium-high heat.  Stir, reduce heat to low and allow to simmer 15 minutes, or until cranberries pop and sauce becomes syrupy.

    Remove from heat and remove tea ball.  Allow to cool, then remove cinnamon stick.  Transfer to a bowl, cover and refrigerate until ready to serve.

    Makes 2 cups.

    Source: Amy Andrews: Your Guide to the Food Room

    Stuffed Pepper Soup

    0

    Category: , , , , , ,

    Ah, Stuffed Pepper Soup.  I haven't had this in a few years, and have been craving it like crazy.  Unfortunately, the local lunch place that sold my favorite Stuffed Pepper Soup went out of business a few years ago.  While I'm still sad they are gone, I am quite happy I have a recipe to make this soup myself now!  I was especially happy to see this recipe included rice, as I remember the local lunch place would serve their version over white rice.  So delicious!


    My craving happened to come at an appropriate time, as I have a ton of peppers coming out of my garden (the last of this years produce besides spinach).  I bumped up the vegetables to make each serving more filling since I wasn't serving anything along side.  Not only did this make a filling, comforting meal, it was a cinch to throw together on a weeknight.

    Here is what you'll need:

    • 1 lb ground beef
    • 2 cups water
    • 16 ounces tomato sauce
    • 28 oz canned plum tomatoes, undrained
    • 1/2 cup uncooked white rice
    • 1 large green bell pepper, chopped
    • 1 large red bell pepper, chopped
    • 2 Tbsp packed brown sugar
    • 1 tsp salt
    • 1 beef bouillon cube
    • 1 teaspoon pepper
    Heat a Dutch oven over medium-high heat.  Season ground beef with salt and pepper, add to pot and cook until brown.  Drain excess fat.

    Add remaining ingredients to pot, stir and break up tomatoes using a wooden spoon.  Bring to a boil, then reduce heat to medium-low.  Cover and simmer 30 minutes or until peppers are tender.  Serves 4.
      Source: Taste of Home

      Italian Beef Stew

      0

      Category: , , , , , ,

      Generally, I make stew in the crockpot.  However, recently I've heard a lot of debate about the crockpot leaving food tasteless.  So I decided to test it out for myself by making this in a Dutch oven.  I'm here to report that this stew was WAY better made on the stovetop, and my husband agreed (he said this was a 10!).  Not only was the flavor sharp, the vegetables were tender, but still intact with nice texture.  


      This stew was a great end to a busy, cool weekend.  We paired it with croissants, and an MLB playoff game.  We are both excited that there was plenty leftover for lunch during the week. 

      Here is what you'll need:
      • 6 Tbsp olive oil
      • 1 1/4 b beef stew meat cut into 1 in. chunks
      • 1/4 cup flour
      • salt and pepper
      • 1 large onion, diced
      • 1/2 leek, diced
      • 1 small stack celery, sliced
      • 2 small carrots, peeled and sliced
      • 1 small parsnip, peeled and sliced
      • 1 small purple top turnip, peeled and diced
      • 4 red potatoes, diced 
      • 2 cloves garlic, minced
      • 1 1/2 cup beef broth
      • 2 beef bouillon cubes
      • 28 oz. canned plum tomatoes, including juice
      • 1 1/2 tsp dried thyme
      • 1 tsp oregano
      • 1 bay leaf
      Heat 2 Tbsp olive oil in a Dutch oven over medium-high heat.  In a small bowl combine flour, 1/2 tsp salt and 1/2 tsp pepper.  Add 1/2 stew meat to the bowl, coating the meat with flour.  Add to Dutch oven, cook until browned on all sides, stirring with a wooden spoon as needed.  Remove meat to a plate and set aside.  Add 2 Tbsp olive oil to Dutch oven, repeat coating and cooking remaining meat.  Remove meat and set aside.

      Add remaining 2 Tbsp olive oil to Dutch oven.  Add onion, leek and celery and cook, stirring occasionally, until softened and slightly browned.  Add salt and pepper to taste.  Add carrots, parsnip, turnip, potatoes and garlic, stir and cook until garlic is fragrant.

      Add beef broth, bouillon, tomatoes and spices. Stir, break up tomatoes with the spoon and scrape bottom of Dutch oven to release the brown bits.  Add beef, stir, and cover.  Reduce temp to low and cook 30 minutes or until vegetables are tender and sauce has thickened.  Serves 6.

      Source: Adventures in My Kitchen

      Foil Packet Summer Squash

      0

      Category: , , , ,

      If I had to choose a favorite vegetable it would probably be summer squash.  I find it incredibly versatile; there are so many options to prepare it and it goes well with just about everything.  I don't think I could ever tire of it.


      You may still be getting summer squash or zucchini from your garden, and you're probably still grilling, so I thought I'd share my favorite way to prepare it with you.  This is just as easy to make for 8 people as it is for 1.  Actually when I first started making this I was living on my own, and I ate this more than I'd like to admit.

      Here is what you need for each packet (1 serving):
      • 1 medium summer squash or zucchini, chopped
      • 1 small-medium green or red pepper, chopped
      • 1 small onion, chopped
      • salt and pepper
      • juice of 1/2 lemon 
      • 1 1/2 tsp butter
      • 1/4 tsp red pepper flakes
      • 1 1/2 tsp olive oil
      Take 2 pieces of foil and layer them crosswise.  Place chopped vegetables on tin foil.  Salt and pepper to taste.

      In a coffee cup, place lemon juice, butter, red pepper flakes.  Melt in microwave 40 seconds.  Add olive oil and stir to combine.  Pour over vegetables.  Wrap foil to make a completely enclosed packet. 

      Place foil packet on hot grill.  Cook 8 minutes, flip and cook another 8 minutes or until squash is cooked to your desired tenderness.

      Source: Adventures In My Kitchen original

      Summer Corn and Tomato Salad

      2

      Category: , , , ,

      I'm always looking for new ways to utilize these star vegetables of summer.  This salad is inspired by this corn soup recipe I started making 2 summers ago (I hope to make and blog this soon).  Since I had both a leftover ear of corn and fresh tomatoes on hand, and I knew they went well together I decided to make a light salad to accompany our Shrimp Burgers.


      The corn and scallions tied in nicely with the burgers.  I just used a bit of vinegar to give it some flavor, but still keep the flavor mild which I appreciated for balancing out the tartness of the burger's tartar sauce.

      Here is what you'll need:
      • corn kernels, cut from 2 fresh cobs of corn
      • 2 medium tomatoes, chopped
      • 2 Tbsp chopped scallions
      • 1 Tbsp olive oil
      • 2 tsp red wine vinegar
      • sea salt and freshly ground pepper to taste
      Place all ingredients in a small bowl and combine well.  Let sit for a 20 minutes before serving.   Serves 2 as a side.

      Shrimp Burgers

      0

      Category: , ,

      If I ask JR what he wants for dinner, at least 50% of the time he will respond, "bacon cheeseburgers".  While I'll occasionally eat a cheeseburger, it's rarely something I want for dinner.  Make it a turkey burger and I'm on board, but then JR isn't interested.  It's complicated.  I need to expand our burger horizon and that's exactly what I did with these Shrimp Burgers I saw on Pink Parsley.


      These were delicious, but messy!  I adapted the recipe slightly, mainly leaving out most of the cayenne and hot sauce since JR cannot tolerate heat.  See I have issues here, no turkey burgers, no heat...and the list goes on.  Even with less heat (really no heat since it's only used to boil the shrimp then rinsed off) these were packed with flavor!  JR agreed that a burger doesn't have to be made of beef to taste great!

      I had some trouble keeping these from falling apart, but since there was tartar sauce to cover them up you probably couldn't tell.  I thought maybe it was because I didn't finely grind the breadcrumbs.  It was hot and I was being lazy, so I just broke the bread up into small pieces.  However, Josie mentioned she had the same problem and she thought it was due to the chopped vs. ground shrimp.  

      While the burgers were great, let's talk about this tartar sauce.  YUM!  I've never experimented with tartar sauce beyond mixing relish and mayonnaise, and I never realized what I was missing!  This tartar sauce will no doubt be my go-to from now on.  So even if shrimp is not your thing, make this tartar sauce to accompany fish sticks!

      The changes I made are listed here:

      For the Burgers:
      • 2 quarts water
      • 1 Tbsp peppercorns
      • 1 Tbsp celery seeds
      • 1 Tbsp mustard seeds
      • 6 bay leaves
      • 1/2 cup sea salt
      • 1 Tbsp ground cayenne pepper
      • 1 pound shrimp, shells on 
      • 2 scallions, chopped
      • corn kernels, cut from 1 fresh cob of corn
      • 1 Tbsp grated fresh ginger
      • zest of 1 lemon
      • juice of 1 lemon
      • 2 Tbsp mayonnaise with olive oil
      • 1 Tbsp Greek yogurt
      • 1 cup fresh breadcrumbs
      • sea salt
      • freshly ground black pepper
      • 1 egg, lightly beaten
      • 2 Tbsp canola oil
      In a large pot, add water, peppercorns, celery seed, mustard seed, bay, 1/2 cup sea salt and cayenne t.  Bring to a boil over high heat.  Add shrimp and boil for 2 minutes until they turn pink.  Remove from heat and run under cold water to cool.  Peel, devein and chop (or grind) the shrimp, then place in a large mixing bowl.

      To the mixing bowl with shrimp, add scallions, corn, ginger, lemon zest and juice, mayonnaise, yogurt, breadcrumbs, salt and pepper.  Stir to combine all ingredients together well.  Add egg and gently fold into mixture.

      Form mixture into 4 even size patties.  Wrap each tightly in plastic wrap and place in the refrigerator for at least 30 minutes to chill and mold together (I would recommend longer, maybe an hour).

      In a large frying pan, heated oil over medium-high to high heat.  Once oil is hot, but not smoking, gently place shrimp burgers into pan.  Cook for 3-4 minutes until browned.  Flip and cook other side 3 minutes until browned.  Remove from pan and place on a plate lined with paper towel to absorb any extra oil.

      For the Tartar Sauce:
      • 1/2 cup drained pickle relish
      • 1/4 cup mayonnaise with olive oil
      • 1/4 cup non-fat Greek yogurt
      • juice of 1 lemon
      • 1 tsp lemon zest
      • 1 tsp Dijon mustard
      • sea salt
      • freshly ground black pepper
      Mix all tartar sauce ingredients together in a small mixing bowl.

      Serve burgers on rolls of your choice topped with tartar sauce, lettuce, tomato or other toppings of your choice.  Serves 4.

      Fig and Arugula Salad

      4

      Category: , , , ,

      This post jumped to the front of the line after our Sunday lunch.  When I can serve my husband a meal with very minimal meat, and he's satisfied, it's cause for celebration!  As we started lunch JR was making comments such as, "this is really good", "I'd eat this again", "these figs are the perfect ripeness".  He never asked, "where's the meat?"  I'm shocked, but I shouldn't be.  I did add just a few very slices of shaved prosciutto to the salads, and that was enough for him.  Lesson learned.


      Since fig season is so short, when I came across this recipe on courant.com last week, it immediately went on our weekly menu plan.  I'm so grateful it did.  I found arugula and a perfect goat milk feta, not too salty, at Sunday's farmer's market.  I was unsure about arugula since I'd never had it before and I'm not generally fond of bitter flavors, however, it worked really well here.

      I served this with a side of toasted baguette (also from the farmer's market), sliced and drizzled with olive oil and the remaining dressing.  This really was the perfect lunch for a blazing hot Sunday.

      Here is what you'll need:
      • 1 bunch arugula
      • 2.5 oz. feta cheese, cubed
      • 4 figs, quartered
      • 4 slices shaved prosciutto 
      • 1/4 cup pecans
      • 1 Tbsp balsamic vinegar
      • 4 Tbsp olive oil
      • 1 Tbsp honey
      • 1/2 tsp sea salt
      In a small frying pan, toast the pecans over medium-high heat.  Be sure you watch them carefully and shake the pan a few times to move them around.  When you begin to smell the nuts, they're done.  Remove them from the heat and allow to cool.  Once cool, chop.

      Arrange arugula, feta, figs, prosciutto and pecans on a plate.

      In a small bowl, add vinegar, olive oil, honey and salt.  Whisk well.  Drizzle over salad.  Serves 2 as a main meal, serves 4 as a side.

      Goat Cheese, Mushroom and Pancetta Quiche

      1

      Category: , , ,

      Our niece stayed with us recently and for Saturday morning breakfast I knew I wanted to make a quiche.  Quiche is one of those great breakfast treats that you can make ahead and eat anytime, whether it's breakfast, lunch or even dinner.  This proved to be really useful as we had drop-in guests come by and I had something on hand to serve them.

      This isn't my first quiche post, I've made this vegetable one before.  I followed that same basic recipe, but decided to change up the flavors based on what I had in the refrigerator, which happened to include two of my favorite ingredients - mushrooms and goat cheese.  I really wasn't sure how the goat cheese was going to work in this, but I'm glad I took the risk.  It provided a nice slightly tart flavor and creamy texture.


      I also included a new ingredient to my kitchen, garlic scapes.  If you've never used them, you should try them.  It may be too late to get them this year, they have a short season, but you can look for them at your farmer's market next year.  They added the perfect light, garlicky flavor and slightly crunchy texture to this dish.

      This was definitely a winner with only one piece left after I served it and that piece was gone quickly the next morning.  You certainly don't need to wait for guests to make this, in fact I think you should make this as a breakfast treat for yourself soon!

      Here is what you'll need:
      • 4 oz. pancetta, diced
      • 1 Tbsp olive oil
      • 10 oz. mushrooms, sliced
      • 3 garlic scapes, chopped
      • salt and pepper
      • 4 eggs
      • 3/4 cup 2% cottage cheese
      • 1 cup shredded cheddar cheese 
      • 1/4 cup 2% milk
      • 1 tsp dried mustard
      • 1 Tbsp fresh chives, chopped
      • 1 Tbsp all purpose flour
      • 1 pie crust
      Preheat oven to 350 degrees.

      Bake crust for 10 minutes.

      While crust is baking, in a large saute pan on high heat, add pancetta to pan and cook until starting to brown.

      Turn pan down to medium-high heat and add oil.  Add mushrooms and cook until partially browned, stirring occasionally.  Add garlic scapes, salt and pepper to taste, and cook until browned and softened, stirring occasionally.  Once done, remove from heat and set aside to cool a bit.

      In a bowl combine eggs, cheeses, milk, mustard, chives and flour stir until thoroughly mixed.

      Spoon mushroom mixture into bottom of pie crust, then layer egg mixture on top of mushroom.  

      Place in oven and bake 45-50 minutes until knife inserted come out clean.  Allow to set for 10 minutes before cutting.  Serves 8.