spoon

Pumpkin Zucchini Muffins

2

Category: , , ,

Still have zucchini from your garden? Thinking about Fall? This baked treat is a perfect combination.

I was having thoughts of Fall this weekend. Fair season is starting up and all things pumpkin will be here before we know it! However, I'm still in full on zucchini mode over here, so my search for a combination of the two led me to this recipe.


I added a few spices and cinnamon chips to bring on even more Fall flavor. These muffins are super moist, and are going to be the perfect comforting treat for those long work and school days this week.

Here is what you'll need:
  • 3 eggs
  • 2 cups granulated sugar
  • 1/3 cup canola oil
  • 3/4 cup canned pumpkin
  • 3 cups all purpose flour
  • 1 tsp cinnamon
  • 1/4 tsp nutmeg 
  • 1/4 tsp ground ginger
  • pinch of ground cloves
  • 1 tsp salt
  • 1 tsp baking soda
  • 1 tsp baking powder
  • 2 1/2 cups shredded zucchini
  • 1/2 cup cinnamon chips
Preheat oven to 350F. Grease 24 muffin cups with baking spray, or alternately line with cupcake liner, and set aside.

Combine eggs, sugar, oil and pumpkin in the bowl of a stand mixer. Mix until well combined.

Add dry ingredients to bowl of stand mixer. Mix on low until just incorporated.

Add zucchini and cinnamon chips to batter and mix until incorporated.

Pour evenly into muffin cups (approx. 1/3 cup per cup). Reduce oven to 325F degrees and bake for 22 minutes, or until toothpick inserted comes out clean (or with a few crumbs, but no batter). Remove from oven and tilt each muffin in it's muffin cup to cool. Makes 24 muffins.

Alternately, you could bake this in 2 loaf pans for 50-60 minutes.

Source: Adapted from Spend with Pennies

Basil Pesto

0

Category: ,

Pesto is relatively new to me. It's really only been on my radar for the last year and boy how we've made sure to make up for lost time. Last year's garden produced so much basil I was at a loss for what to do with it. Enter the ideas of my trusty blogging friends and we've got pesto for the whole year.


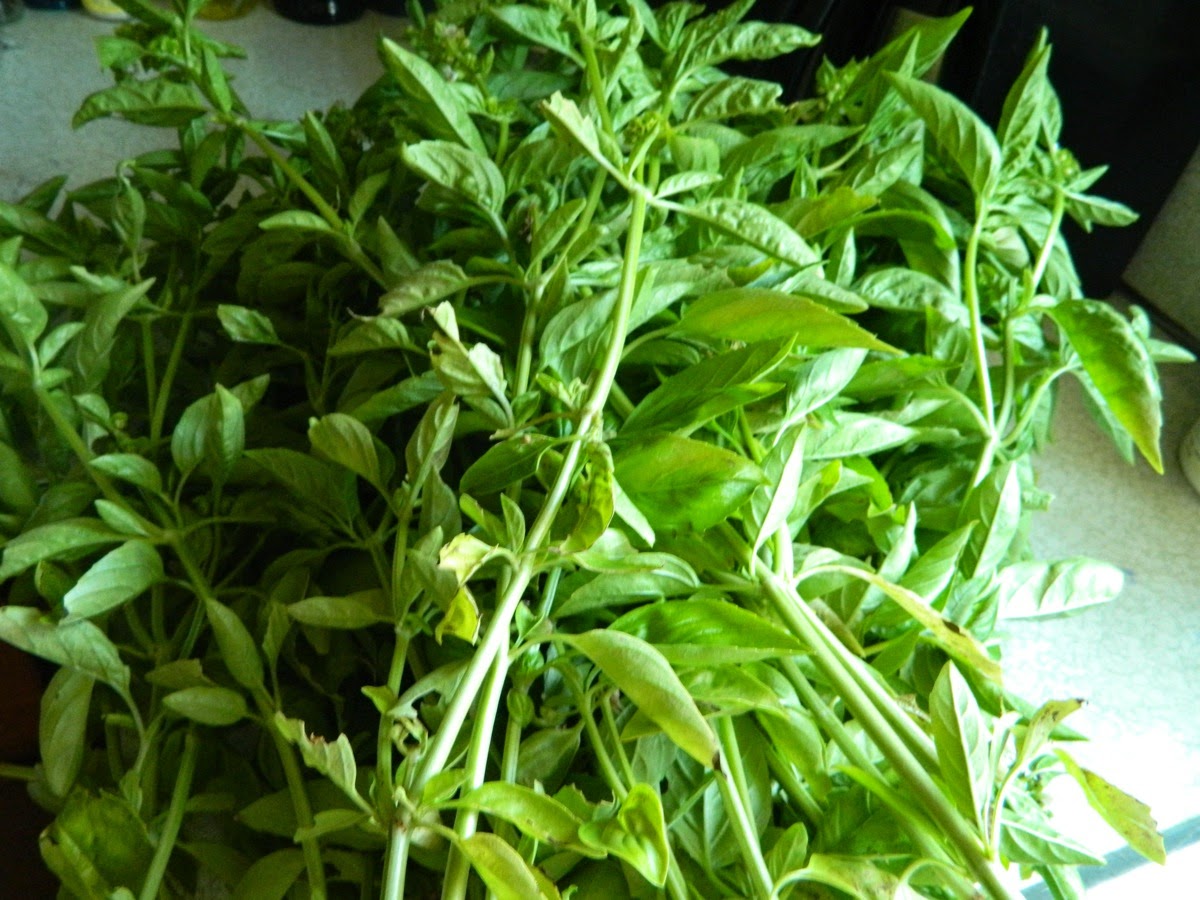
This year our garden didn't produce as much basil, but we still had an armful that needed to be picked and put up for future use. Since pesto became such a big hit in our house, it was a no-brainer what I'd do with this years bundle of basil.


This is more of a method vs. real recipe since the texture and flavor is up to you. Some of my favorite ways to use this pesto are:
  • Toss with hot pasta and a splash of half and half
  • Toss a cube or 2 into some roasted cherry tomatoes for a fresh tasting pasta sauce (with or without zucchini)
  • Use as a marinade for chicken
  • Add a few cubes to an easy foil packet meal of shrimp and vegetables over rice
Here is what you'll need:
  • 5-7 garlic cloves
  • ~1/3 cup Parmesan, Pecorino and or Romano cheeses
  • ~1/3 cup nuts (I've used pecans, almonds, hazelnuts, and cashews are especially delicious!)
  • ~1/3 to 1/2 cup olive oil
  • a few handfuls of basil
  • kosher salt
  • freshly cracked black pepper
Place garlic, cheese, nuts and oil in food processor. Pulse until finely chopped.

Add basil and pulse until smooth or your desired texture. Add salt and pepper to taste. You may need to add some olive oil to smooth out the texture.

Use immediately, or spoon into an ice cube tray, cover and freeze. Once frozen, remove from ice cube tray and store in the freezer in a ziplock bag. 

When you are ready to use it, take it out of the freezer that morning, or the night before, and place in the refrigerator to thaw. I've stored this up to 1 year in the freezer with good results. Makes about 1 1/2 cups.

Source: Adapted from Epicurious

Canning: Strawberry Rhubarb Jam

0

Category: , ,

Remember those 7 lbs of strawberries? Ice cream and cake wasn't enough to use them all up, for that matter making jam didn't finish them up either. However, this jam did make a big dent in the remaining berries.

I've been wanting to make jam for awhile, and when Heather suggested Strawberry Rhubarb Jam it was perfect since I had some rhubarb in the freezer. My sister declared this the best jam she has ever eaten (homemade or store bought). If that isn't enough to convince you to try it, I'm not sure what would.

Here's what you'll need:
  • 2 cups whole strawberries, crushed
  • 2 cups rhubarb
  • 1/4 cup lemon juice
  • 6 Tbsp classic pectin
  • 1 tsp cinnamon
  • 5 1/2 cups granulated sugar
To prep jars for canning, heat jars and lids in simmering water until ready for use. Do not boil. Set bands aside.

In a large stainless steel pot, combine strawberries, rhubarb and lemon juice. Whisk in pectin until dissolved.

Bring to a boil over high heat stirring often. Add sugar and cinnamon, and return to a full boil, stirring constantly. Boil hard for 1 minute while stirring.

Remove from heat and skim foam if necessary.

To Can:

Remove hot jars from water. Ladle hot jam into hot jars leaving 1/4 inch headspace. Remove air bubbles by running a sterile knife around the inside of the jar. Wipe rim clean. Center lid on jar. Apply band and tighten until just tight (do not force).

Place jars in boiling water bath making sure water covers jars by at least 1 inch. Process jars in the boiling water bath for 10 minutes. Remove jars from water and set aside to cool.

After 24 hours, remove bands and check lids for seal. Lid should not flex up and down when center is pressed and lids should stay intact when lifting jar by the lid. Store on a cool, dark shelf.

Makes ~ 6 half-pints.
Source: Ball's Blue Book Guide to Preserving as seen on Hezzi-D's Books and Cooks

Strawberry Summer Cake

0

Category: , ,

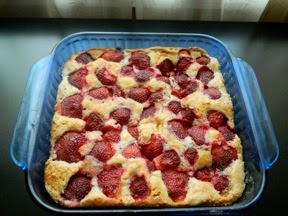
Cake or pie? Given the choice, I always choose pie and pie is what I was looking to make with our strawberries. That was until JR caught wind of my plans. Cake is his preference, and since I knew he'd more than likely be eating the majority of this treat, I went ahead and fulfilled his request.


I was pretty sold on this cake after reading the reviews. It was described as  having a "jammy" top and well, I do love anything strawberry jam! Plus, this was super simple to make which is a bonus in my book!

I'm rethinking my always choose pie decision. We gobbled this cake up at a very fast pace and I'm willing to bet you will too when you make it. It's already on my list of things to make when our short late strawberry season comes around in a few weeks.

Here is what you'll need:
  •  6 Tbsp unsalted butter, softened
  • 1 cup granulated sugar
  • 1 large egg
  • 1/2 cup milk
  • 1/2 tsp almond extract
  • 1 1/2 cup flour
  • 1 1/2 tsp baking powder
  • 1/2 tsp salt
  • 1 1/2 cup strawberries, stemmed and halved 
  • 2 Tbsp granulated sugar
Preheat oven to 350F. Grease 8x8 glass baking dish and set aside.

In the bowl of an electric stand mixer, cream butter and 1 cup sugar until fluffy, approx. 3 minutes. Add the egg, milk and almond extract and beat until well combined.

In a small bowl, combine flour, baking powder and salt. Slowly add dry mixture to wet mixture and beat until well incorporated.

Pour batter into greased baking dish. Place strawberries cut side down on top of batter. Sprinkle with remaining 2 Tbsp sugar.

Place in oven and bake for 10 minutes. Reduce oven temp to 325F and continue baking for 50-60 minutes, until a toothpick insert comes out clean (it may have some strawberry on it, but no wet batter should be visible). Cool on a wire rack before serving. Serves ~ 9.

Source: Slightly adapted from Martha Stewart as seen on Smitten Kitchen

Sweet Cream Strawberry Ice Cream (Lactose Free)

0

Category: , , ,

JR and I went strawberry picking this year for the first time together. There is a very popular place around, and since I imagined it would be packed with people I sought out a smaller local farm that was actually closer to home. I loved driving up and seeing the little hand painted wooden strawberry sign hanging on the side of the road.

Remember I said JR and I went, well, he sort of just directed me while I picked. It was funny when a lady a row over from us asked if he was actually helping or not. I think his idea of helping is the eating part after. This is fine by me because there would be a lot of eating after picking 7 lbs of berries!


I sought out recipes from my cooking board friends because I knew they'd have the best recipes to share. It's funny, one of the ice cream recipes I read stated they were making it for milkshakes, and that is exactly what JR asked for. Besides cake, which will come in another post.

This recipe was an experiment in the sense that I was trying to make it lactose free. I know some people will turn their nose up at using coffee creamer, so go ahead and use real cream instead (as long as you don't care about it being lactose free). Since JR can be a "picky pants", I was going more for flavor over healthy here. Who am I kidding, ice cream isn't exactly healthy to begin with!

My experiment worked for the most part. Why for the most part? Like it's name suggests, this ice cream is sweet, so adding milk for a milkshake helped subdue the sweetness, and the texture lends better to milkshakes vs. eating. While I'd prefer my ice cream straight up, a milkshake works too!

Here is what you'll need:
  • 3 3/4 cups whole strawberries
  • 3 Tbsp agave
  • 1 cup 2% reduced fat lactose free milk
  • 1/2 cup sugar
  • 1/2 vanilla bean, scraped
  • 5 large egg yolks
  • 1 3/4 cup Italian Sweet Cream coffee creamer
  • 2 tsp Kirsch, optional
Place strawberries and agave in a medium pot and cook over medium heat until strawberries are softened and begin to break down. Allow to cool and puree in blender. Set aside.

In a saucepan over medium-low heat, warm milk, sugar and vanilla bean with scrapings. Once warmed, remove from heat.

Whisk egg yolks in another mixing bowl. Slowly add warm milk mixture to egg yolks, whisking constantly. Return mixture to saucepan. Heat saucepan over medium heat, stirring constantly until mixture thickens and coats the back of a spoon.

Pour coffee creamer into a large mixing bowl. Place a mesh strainer over bowl. Pour custard through the strainer.

Make an ice bath of ice and water in another large mixing bowl. Place bowl of custard into the ice bath. Stir custard over ice bath until cooled. Place custard in the refrigerator to chill completely.

Remove custard from refrigerator and stir in Kirsch. Churn the mixture in an ice cream maker according to the manufacturer's instructions. Freeze in an airtight container with a piece of plastic wrap pressed against the ice cream to keep ice crystals from forming.

Source: Adapted from David Lebovitz

Zucchini Recipe Round-up

1

Category: , , ,

It's zucchini-palooza around here these days! It seems like every other day I find a monster. You know the ones I'm talking about, somehow it wasn't visible yesterday and today it's the size of a baseball bat! I've been searching my yellow squash plant for the monsters as well, but it's funny how things work out sometimes. We have so many zucchini and haven't picked any yellow squash, yet my sister is the complete opposite with a lot of yellow squash and a dying zucchini plant.


For ease, we generally eat the zucchini grilled, roasted or stuffed, but that can only happen so many times before it becomes boring. Have no fear, since I haven't posted anything new in months, I figured I'd at least share with you my favorite savory and sweet zucchini/summer squash recipes to keep things far from boring!

Zucchini Cornbread
Shaved Summer Squash with Prosciutto and Goat Cheese
Zucchini Corn Fritters
Turkey Burger Pitas with Tzatziki
Harvest Muffins
Foil Packet Summer Squash
Here are some friends' recipes that I've made and recommend as well:

Chocolate Zucchini Bread from Alida's Kitchen

Pineapple Zucchini Bread from Sweet Beginnings

Pasta with Zucchini Cream Sauce from The Way the Cookie Crumbles

Black Bean Roasted Zucchini Goat Cheese Enchiladas from The Way the Cookie Crumbles

If you don't get around to making these now, shred that zucchini and freeze it so you can make these yummy treats in the dead of winter!

Pineapple Cream Puffs

2

Category: , ,

As I previously mentioned, years ago my aunt made a Pineapple Cream Puff which I fondly remember. Since I can't replicate her recipe, I did my best to adapt the Strawberry Cream Puffs. While not the same ones I remember, these were very good.


Here is what you'll need:
  • 1/2 cup pineapple puree (about 1 cup of fresh pineapple)
  • 1/2 cup heavy whipping cream
  • 2 Tbsp confectioners' sugar
  • 8 oz cream cheese
  • 1/3 cup confectioners' sugar
  • 1/2 tsp vanilla extract
  • 2 sheets of puff pastry
  • 1 egg yolk, beaten
  • confectioners' sugar (for sprinkling)
  • pineapple, diced for garnish
Take puff pastry out of freezer and let sit 20 minutes while you make the filling. Preheat oven to 430F. Line 2 baking sheets with parchment paper.

To make the puree, place 1 cup of pineapple in a blender or food processor and pulse until pureed to an almost smooth consistency. Set aside.

To make pineapple cream, in the bowl of a stand mixer, beat heavy cream on high until foamy Add 2 Tbsp confectioners' sugar and beat until stiff peaks form. Transfer to a mixing bowl and set aside.

In the bowl of a stand mixer, beat cream cheese until smooth. Add 1/3 cup confectioner's sugar and vanilla, and beat until smooth. Be sure to scrape down the sides to make sure ingredients are well combined. Add pineapple puree to cream cheese mixture and mix on low until combined. Remove bowl from stand mixer.

Gently fold whipped cream into pineapple cream until combined. Transfer cream to pastry bag with large tip, or alternately use a zip lock bag with corned cut off. Refrigerate until ready to use.

To make pastry, unfold a sheet of puff pastry on wax paper. Cut each sheet into 9 pieces for regular sized cream puffs, or 25 pieces for mini cream puffs.

Transfer cut pastry to parchment lined baking sheet. Brush pastry with egg yolk.

Bake for 11-13 minutes, or until pastry has risen, browned and looks dry. Remove from oven and completely cool on wire racks.

Cut each pastry in half. Pipe ~1/4 cup of cream onto each pastry bottom. Place other half of pastry on top of cream. Sprinkle with confectioners' sugar. Pipe a small dollop of cream on top. Garnish with diced pineapple. Serve immediately.

For mini cream puffs, I baked the puff pastry for 8 minutes. After the puff pastry cooled, I cut a hole in the top of the puff pastry, sprinkled with confectioner's sugar, filled the hole with cream and sprinkled a few pieces of diced pineapple on top of the cream.

Makes 18 cream puffs (shown here) or 50 mini cream puffs (not shown).

Source: Adapted from Glorious Treats

Strawberry Cream Puffs

0

Category: , ,

Continuing on with bite-sized treats theme, Strawberry Cream Puffs came to be on the party menu when I was remembering a cream puff from my childhood. My aunt would make Stella D'oro Anginetti cookies stuffed with a pineapple cream. These showed up at most, if not all, family events and I remember licking every last sugar crumb off my fingers. I knew sister-in-law would love these!


To my disappointment, Stella D'oro discontinued Anginetti cookies. I hear they may be making a come back soon, I certainly hope so! I was determined to make something similar when I found this Strawberry Cream Puffs recipe on Glorious Treats.


The great thing about this recipe is that I was able to make the cream in steps ahead of time, and just bake off the pastry to fill right before leaving for the party. You don't want bake and fill in advance since the pastry doesn't hold up very long (a couple hours at most).

Here is what you'll need:
  • 1/2 cup strawberry puree (about 1 cup of strawberries)
  • 1/2 cup heavy whipping cream
  • 2 Tbsp confectioners' sugar
  • 8 oz cream cheese
  • 1/3 cup confectioners' sugar
  • 1/2 tsp vanilla extract
  • 2 sheets of puff pastry
  • 1 egg yolk, beaten
  • confectioners' sugar (for sprinkling)
  • strawberries, sliced for garnish
Take puff pastry out of freezer and let sit 20 minutes while you make the filling. Preheat oven to 430F. Line 2 baking sheets with parchment paper.

To make the puree, place 1 cup of strawberries in a blender or food processor and pulse until pureed to an almost smooth consistency. Set aside.

To make strawberry cream, in the bowl of a stand mixer, beat heavy cream on high until foamy Add 2 Tbsp confectioners' sugar and beat until stiff peaks form. Transfer to a mixing bowl and set aside.

In the bowl of a stand mixer, beat cream cheese until smooth. Add 1/3 cup confectioner's sugar and vanilla, and beat until smooth. Be sure to scrape down the sides to make sure ingredients are well combined. Add strawberry puree to cream cheese mixture and mix on low until combined. Remove bowl from stand mixer.

Gently fold whipped cream into strawberry cream until combined. Transfer cream to pastry bag with large tip, or alternately use a zip lock bag with corned cut off. Refrigerate until ready to use.

To make pastry, unfold a sheet of puff pastry on wax paper. Cut each sheet into 9 pieces for regular sized cream puffs, or 25 pieces for mini cream puffs.

Transfer cut pastry to parchment lined baking sheet. Brush pastry with egg yolk.

Bake for 11-13 minutes, or until pastry has risen, browned and looks dry. Remove from oven and completely cool on wire racks.

Cut each pastry in half. Pipe ~1/4 cup of cream onto each pastry bottom. Place other half of pastry on top of cream. Sprinkle with confectioners' sugar. Pipe a small dollop of cream on top. Garnish with strawberry slice. Serve immediately.

For mini cream puffs, I baked the puff pastry for 8 minutes. After the puff pastry cooled, I cut a hole in the top of the puff pastry, sprinkled with confectioner's sugar, filled the hole with cream and sprinkled a few pieces of diced strawberries on top of the cream.

Makes 18 cream puffs (shown here) or 50 mini cream puffs (not shown).

Source: Adapted from Glorious Treats

Cherry Brownie Cups

0

Category: , , ,

Cherry Brownie Cups are another dessert I made for my sister-in-law's 50th birthday party, along with the Blood Orange Mini Cupcakes I already posted (and a few recipes still to come). I had taken these to her house before so I knew they would go over well with this crowd.

If you are entertaining a crowd anytime soon, make these. It's hard to resist a chewy brownie, filled with chocolate fudge cream and topped with a cherry!  Plus these are easy to make and super cute.


Even if you aren't entertaining soon, you could easily make a batch just because you need them in your life, and of course you could surprise with your neighbors or coworkers with 1/2 the batch!

For the Brownies:
  • 3/4 cup butter, cubed
  • 2 oz. unsweetened chocolate, chopped
  • 2 cups granulated sugar
  • 4 large eggs
  • 1 tsp vanilla extract
  • 1 cup all-purpose flour, sifted
Preheat oven to 350F. Line mini cupcake pan with cupcake liners.

In a medium saucepan over medium-low heat, melt butter and chocolate. Remove from heat and stir in granulated sugar until dissolved. Transfer mixture to a large bowl.

Add eggs, one at a time, beating well after each addition. Stir in vanilla and mix well.

Gradually add flour and stir until well combined.

Drop 1 Tbsp of batter into cupcake liner. Bake for 20-22 minutes, or until toothpick inserted into the center comes out clean.

Remove from oven and cool for 5 minutes. Using the handle of a wooden spoon, make an indentation in the top of each brownie. Remove brownies from pan and cool completely on wire racks.

For the Fudge Cream:
  • 3 oz. cream cheese, softened
  • 1 tsp vanilla extract
  • 1/4 cup corn syrup
  • 1 1/2 oz. unsweetened chocolate, chopped, melted and cooled
  • 1 cup confectioners' sugar
  • 1 jar (10 oz. maraschino cherries with stems, drained
In the bowl of a stand mixer, beat cream cheese and vanilla until smooth. Add corn syrup and melted chocolate (it's important that the chocolate is cooled), and mix until well combined. Add sugar and beat until smooth.

Transfer cream into a pastry bag with round tip, or alternately use a zip lock back with corner snipped off. Fill the brownie center with 1 tsp of cream. Top with cherry. Store in the refrigerator.

Makes 5 dozen.

Source: Taste of Home Holiday, November 2010 

Blood Orange Mini Cupcakes

1

Category: , ,

My dear sister-in-law recently turned 50. She's been planning a big party for about a year now and asked me to make the desserts. She left the dessert menu up to me, which ended up working perfectly since I decided on these cupcakes the morning of the party.


About a week before, I picked up a bag of blood oranges. I asked my cooking message board what I should use them for, but I never used any of their suggestions (sorry!). My last minute thought was to turn the blood oranges into a pretty pink cupcake to go with this Spring themed party. While the cupcakes didn't come out pink, the frosting filled that void.

These cupcakes were the perfect bite size treat, and incredibly moist with a hint of orange flavor. The candied oranges make these perfect, and like Annie, I would recommend you don't skip this step.

These would be great for a bridal or baby shower, Spring, Easter or tea party.

Stay tuned for more bite-size treats.

For the cupcakes:
  • 2 cups granulated sugar
  • 2 Tbsp blood orange zest
  • 1 cup unsalted butter, at room temperature
  • 4 large eggs
  • 1½ cups milk (I used 2%)
  • ½ cup freshly squeezed blood orange juice
  • 2 Tbsp vanilla extract
  • 4 cups all-purpose flour
  • ½ tsp baking powder
  • ½ tsp baking soda
  • ½ tsp salt
Preheat oven to 350F. Line mini cupcake pan with paper liners.

Place sugar and orange zest in a food processor and process until zest is finely chopped and combined with the sugar.

In the bowl of a stand mixer, combine sugar and butter and cream on medium-high speed until well combined, about 2-3 minutes. Add eggs one at a time and mix well.

In a medium bowl, combine milk, orange jusice and vanilla. Set aside.

In a medium bowl, combine flour, baking powder, baking soda and salt. Set aside.

Add 1/3 of flour mixture to butter mixture and beat on low until just combined. Add 1/2 liquid mixture to batter and beat on low until just combine. Repeat with additions of flour, liquid and ending with flour mixtures. Turn off mixer and scrape down sides of bowl. Mix batter on medium for about 30 seconds to make sure ingredients are well combined.

Fill each cupcake liner with 1 Tbsp of batter. Bake 10-12 minutes. Test by gently touching the cupcake tops, if they spring back the cupcakes are done. Be careful not to overbake.

Remove from oven and place cupcakes on cooling rack.

For the candied oranges:
  • 1½ cups granulated sugar
  • 1½ cups water
  • About 11 thin blood orange slices
In a large saucepan, combine sugar and water and place over medium-high heat. Once sugar is dissolved, place orange slices in the pan in a single layer with none overlapping. Reduce heat to medium-low and simmer for about 20 minutes. Turn orange slices once to allow both sides to become candied.

Remove orange slices from the pan and transfer to a container with a little liquid. Allow to cool before using.

Repeat process with remaining orange slices. You may use the same liquid for each batch, however, if the liquid starts to thicken or solidify you may need to start a new batch.

Once cooled, cut orange slices into 8 pieces.

For the glaze:
  • 4-5 Tbsp freshly squeezed blood orange juice
  • ~1/1/2 cups confectioners' sugar
Once cupcakes are completely cooled, turn cupcake upside down and dip top of cupcake into glaze just far enough so the glaze covers the entire top of the cupcake but doesn't touch the cupcake paper. Lift cupcake, allow excess glaze to drip off, then turn cupcake right side up and place on cooling rack. Repeat with remaining cupcakes.

Place 1 piece of candied orange on each cupcake.

Allow glaze to set (the shine will go away and it will look dry) before serving.

Makes 7 dozen mini cupcakes.

Source: Cupcakes and Candied Oranges are adapted from Annies Eats

Creamy Tomato Basil Soup

0

Category: , , ,

It's been cold, and snowy. I spent all day Saturday in the kitchen. Come Sunday night, I wanted a quick, comforting, warm meal. I really wanted tomato soup and grilled cheese. JR doesn't like tomato soup, or so he thought until he tried this one. He's now edited his statement to "I don't like the tomato soup in the can." 

We both agreed this hit the spot for Sunday dinner and warmed us through. I used tomatoes I canned and basil I frozen, both from our garden, which quickly brought us both back to Summer and longing for Spring. I can't wait to have more for lunch today.


Here is what you'll need:
  • 2 Tbsp olive oil
  • 2 stalks of celery with leaves
  • 1 medium onion
  • seasoned salt
  • black pepper
  • 1 quart whole canned tomatoes
  • 2 beef bullion cubes
  • 1 cup water  
  • 1 Tbsp fresh or frozen basil
  • 3/4 to 1 cup heavy cream or half and half
In a medium pot, add olive oil and heat on medium-high. Add celery and onion and cook until soft, stirring occasionally. Season with salt and pepper.

Add tomatoes, bullion and water, and simmer on medium for 10 minutes. Add basil and stir until combined.

Using an immersion blender, blend soup until smooth, or to your preferred consistency. Alternately, you could transfer the soup to a blender and blend in batches, making sure the blender is never more than 1/2 full of ingredients.

Add cream to soup and simmer over low heat 10 minutes. Do not allow to boil.

Makes 8 cups.

Source: Adventures in my Kitchen

Basic Waffles

0

Category: , ,

JR isn't much of a breakfast eater, but once and awhile on the weekends he'll request pancakes. I, on the other hand, wake up hungry. Who's with me here?! 

A few weeks ago JR mentioned pancakes and I suggested waffles since I just pulled the waffle iron out of the abyss (a.k.a. the hallway closet). He happily agreed and this batch was gone within 24 hours. JR ate his with syrup, and then later as a peanut butter and jelly sandwich. I topped mine with Cranberry Orange Sauce, yum!


If you're new to waffles, this is a great, no fuss recipe to test out your waffle iron. These also freeze beautifully, and can go from freezer to toaster to your belly in minutes. Enjoy!

Here is what you'll need:
  • 2 large eggs
  • 2 cups milk (I used fat free)
  • 2 cups all purpose flour
  • 2 tsp baking powder
  • 1 tsp sugar
  • 1 tsp salt
  • 1/4-1/2 tsp vanilla 
Preheat waffle iron. Spray waffle iron with non-stick spray, or carefully rub vegetable oil over waffle iron.

Whisk together eggs and milk. Add remaining ingredients and whisk until well combined.


Pour 1 cup of batter into preheated waffle iron and cook according to your appliances directions. For crisper waffles, I toast mine in the toaster oven for a few minutes. Makes 4 waffles.

Source: Adapted from Rosemary Brown's Big Kitchen Instruction Book

Canning: Cranberry Orange Sauce

1

Category: , ,


Fresh cranberry sauce is somthing I look forward to every year. I love it with our big holiday meals, as well as for breakfast in Greek yogurt and on a English muffin with cream cheese. I've experimented with several cranberry sauces over the years, but this has become my favorite and the one I turn to time and time again. So much so, I decided to make it twice this year in order to give as Christmas gifts and to enjoy throughout the year.


Here is what you'll need:
  • 12 oz. fresh cranberries
  • zest and juice of 1 orange
  • 3/4 cup water
  • 3/4 cup sugar
  • 2 cinnamon sticks
Combine all ingredients in a medium saucepan and bring to a boil. Reduce heat to medium and gently boil for 10 minutes, stirring occasionally.

To Can:

Heat jars and lids in simmering water until ready for use. Do not boil. Set bands aside.

Ladle hot sauce into hot jars leaving 1/4 inch headspace. Remove air bubbles by running a sterile knife around the inside jar. Wipe rim. Center lid on jar. Apply band and tighten until just tight (do not force).

Process jars in a boiling water for 15 minutes. Remove jars and cool. After 24 hours, remove bands and check lids for seal. Lid should not flex up and down when center is pressed and lids should stay intact when lifting jar by the lid.

Makes ~ 3 half-pints.

Source: Recipe adapted from Ocean Spray; Canning method from Ball's Complete Book of Home Preserving

Turkey and Peas Macaroni and Cheese

0

Category: , ,

There is nothing like a classic baked macaroni and cheese, except maybe a jazzed up version. This recipe came to be out of the need to use up leftover: smoked gruyere, turkey, peas and an excess of shredded cheddar to be exact. This is definitely an example of how to take leftovers from boring to exciting in no time!


Here is what you'll need:
  • 8 oz. small to medium pasta
  • 4 Tbsp butter
  • 1/4 cup all purpose flour
  • 2 3/4 cup milk 
  • 2 tsp Worcestershire sauce
  • 1/2 tsp dried mustard powder
  • 1/4 tsp black pepper
  • 8 oz. shredded extra sharp cheddar cheese
  • 4 oz. shredded smoked gruyere cheese
  • ~1 1/2 cup cubed cooked turkey
  • ~handful of frozen peas
  • ~8 Ritz crackers crumbled
Preheat oven to 350F. Grease 9x13 baking dish and set aside.

Bring water to a boil in a large pot, add salt and pasta. Cook pasta partially through, removing from boiling water 2 minutes before instructions tell you to (you want the pasta undercooked since it will cook more in the oven). Drain and set aside.

In a large saute pan over medium heat, melt butter. Add flour, stir and allow to cook 3-5 minutes until it becomes golden brown. The mixture will bubble and foam, stir to be sure it doesn't burn.

Slowly add milk, stirring constantly until thickened. Add Worcestershire, mustard and pepper, combine well. Add cheddar and American cheeses and stir until melted and smooth. Add cooked pasta, turkey and peas to cheese sauce and combine well.

Pour pasta into greased baking dish. Sprinkle top with cracker crumbs. Bake for 30-45 minutes or until top is golden brown. Serves 6.

Source: Adapted from my Baked Macaroni and Cheese recipe