spoon

Pickled Cucumber and Radish

0

Category: , , ,

With Memorial Day weekend upon us, I wanted to post another healthy side dish option for you to balance out the carb and mayo laden dishes you're sure to face at BBQ's.  Don't get me wrong, I love carbs and mayo, but I also like to have some balance.

Before I get to the recipe, if you're still looking for other healthy side dish ideas, check out these salads Spinach, Fruit and Cheese Salad, Balsamic Strawberry Couscous Salad, Honey Mustard Cole Slaw, Black Bean and Corn Salad and Knock-off Tabbouleh.  And while I'm at it, this Strawberry Shortcake would make a great dessert if you're still searching for one.

When I made the Shrimp and Peas Pasta Salad I had a hard time thinking of what to serve with it.  While it could stand on it's own, I need some variety in my meal.  Since it already contained protein, vegetables, starch and fat, I was stumped.


I recalled the last bunch of radishes I threw away and challenged myself to use them up here.  While we like radishes, they aren't our preferred vegetable so they tend to get pushed to the bottom of the produce drawer.  Once they land there, they sit there, for weeks.  Then I can't figure out what's at the bottom of the produce drawer, and that's not pretty.  I wasn't going to let that happen again.

Enter this pickled salad for which I had all the ingredients on hand.  I added red onion and this became a perfect accompaniment to the pasta salad, ever so slightly sweet without the pungency of raw onion.  This is a very refreshing salad that I can see making again this summer to balance out the starchy, mayo laden, summer salads.  I may play around with it by adding some fresh herbs as well.

This was better the 2nd day, so I would recommend you make it the night before you plan to serve it.

Here is what you'll need:
  • 1/8 cup rice wine vinegar
  • 1/8 cup white vinegar
  • 1/4 cup water
  • 3 Tbsp sugar
  • 1/2 tsp salt
  • 3/4 English cucumber, thinly sliced
  • 1 cup thin radish slices
  • 1/2 red onion, thinly sliced
In a small saucepan, bring vinegar, water, sugar, and salt to a boil.  Once the sugar is dissolved, remove from heat and allow to cool.

Combine cucumber, radish and onion in a bowl.  Pour cooled liquid over vegetables.  Stir, place in a airtight container with a tight fitting lid.  

Refrigerate, shaking the container every once in a while to move the liquid around.  Serves 3.

Shrimp and Peas Pasta Salad with Buttermilk-Herb Dressing

0

Category: , , , , ,

It just so happened we had a late work night the day I planned to make this pasta salad I had seen in Cooking Light's June 2011 magazine for dinner.  Needless to say, I was starving by the time I left work and that usually means I'd order take-out to pick up on my way home.  While take-out was tempting, I knew this recipe was planned for dinner and I thought I could make it quicker than I could gnaw my arm off.


My arm is still attached!  And I am so glad this won over take-out!  Not only is this easy to make, it is packed with flavor and what I would consider it fairly healthy.  I used whole grain pasta and mayonnaise with olive oil.   

Here is what you'll need:
  • 8 ounces uncooked medium shell pasta (I use whole grain)
  • 1 cup frozen green peas
  • 1 lb small-medium shrimp, peeled and deveined (I used the small, sweet, pink Maine shrimp)
  • 1 cup thinly sliced radishes
  • 1/3 cup mayonnaise with olive oil
  • 1/4 cup low fat buttermilk
  • 3 Tbsp minced fresh chives
  • 1 Tbsp chopped fresh dill
  • 1/2 tsp salt
  • 1/2 tsp grated lemon rind
  • 1 Tbsp fresh lemon juice
  • 1/4 tsp freshly ground black pepper
  • 1/8 tsp ground red pepper
  • 2 garlic cloves, minced
Bring water to a boil and cook pasta according to package directions, adding the shrimp and peas during the last 2 minutes of cooking.  Drain and rinse with cold water to stop cooking process.  Allow to set in order to drain off excess water.

While pasta is draining and cooling, in a mixing bowl combine remaining ingredients.

Add cooled pasta, shrimp and peas to mixing bowl.  Toss to combine well and refrigerate at least 30 minutes.  Serves 3-4 as a main dish.

Chicken Piccata

0

Category: ,

I don't know if this happens to you, but when I return from vacation it takes me a day or two to get back into the kitchen.  Then when I do, I want to start with something easy which usually involves pasta.  We recently returned from a vacation that was everything but relaxing, so it was no surprise that it took me a few days to get back in the kitchen. 


I'm not sure why or how I got chicken piccata stuck in my head since I had never eaten it before.  In my search I struggled to decide between Ina's recipe and Giada's recipe, but i ended up following Giada's after reading that Ina's wasn't traditional.  Bonus, it fit my returning from vacation criteria, easy and pasta!

This was a great meal to get me back in the kitchen.  It's so simple to pull together, with bold fresh flavors.  I paired it with fresh angel hair pasta and we skipped a vegetable side tonight!  I think this would also go well with rice.

Here is what you'll need:
  • 2 boneless skinless chicken breasts, butterflied and then cut in half
  • kosher salt
  • ground black pepper
  • 1/2 cup all-purpose flour, for dredging
  • 4 Tbsp unsalted butter, divided
  • 4 Tbsp olive oil
  • 1/3 cup lemon juice
  • 1/2 cup chicken stock
  • 1/4 cup capers
  • 1/3 cup fresh parsley, chopped
Season the flour with salt and pepper. 

Melt 2 Tbsp butter and 2 Tbsp olive oil in a nonstick frying pan over medium-high heat. 

Coat both sides of chicken breasts with flour mixture, shake off excess and place in frying pan.  Be sure not to overcrowd the frying pan.  Cook on first side ~3-4 minutes until browned.  Flip chicken onto second side and cook ~3-4 minutes until browned.  Once browned on both sides, remove from pan.  You may need to do this step several batches based on the size of your pan.

Reduce heat to medium.  Add 2 Tbsp olive oil, lemon juice, chicken stock, capers and parsley to the pan.  Combine and heat through 2 minutes.  Add 2 Tbsp butter to the pan, melt and whisk until well blended.  

Reduce heat to medium-low.  Add chicken back to the pan, cover and simmer 5 minutes.  Serves 4.

    Latin Style Beans

    0

    Category: , , , , ,

    While I've always eaten different types of rice and beans, I hadn't ventured into cooking much and rarely ate these two ingredients together..  That all changed pretty quickly when I met my husband, I needed to learn some basic recipes to keep him satisfied in between trips to his parents (to eat Mami's cooking!).

    Early on in our relationship, he would do some of the cooking and this is one of the recipes he taught me.  Somehow, I've become the one that cooks this, and every meal now (JR, what happened?), and I've put my own spin on this dish.  I've learned that pretty much every Latin household has their own spin on this as well.


    This has become a part of our regular rotation, and I finally took the time to measure so I could share it with you.  I know this picture isn't pretty (I'm still working on my photo and editing skills), but I hope that doesn't stop you from making this dish. 

    Here is what you'll need:
    • 1 Tbsp olive oil
    • 1/4 cup sofrito or recaito
    • 2/3 cup diced ham
    • 2 carrots, diced
    • 1 potato, diced
    • 4 oz mushrooms, diced
    • 3/4 cup chicken stock
    • 1 packet Sazon
    • 1/2 tsp adobo
    • 4 oz. tomato sauce
    • 15 oz. can of beans, drained and rinsed
    In a medium sauce pan, heat olive oil over medium high heat.  Add sofrito and cook until fragrant.

    Add ham and cook, stirring occasionally, until lightly browned.  Add carrots, potato and mushrooms.  Continue cooking until slightly browned.

    Add chicken stock, bring to a boil.  Reduce heat to medium and continue cooking ~5 minutes until vegetables are halfway cooked through.

    Add remaining ingredients, stir, reduce heat to medium low, cover and allow to simmer 10 minutes..  You will want to be sure there is enough liquid throughout the cooking process.  If the liquid has reduced too much, add chicken stock or water (we like our beans a little soupy) to keep the beans from mashing together.

    After 10 minutes, taste and adjust seasoning as necessary.  Cook another 5 minutes.  Serves 4.

      Stovetop Mac and Cheese

      2

      Category: , ,

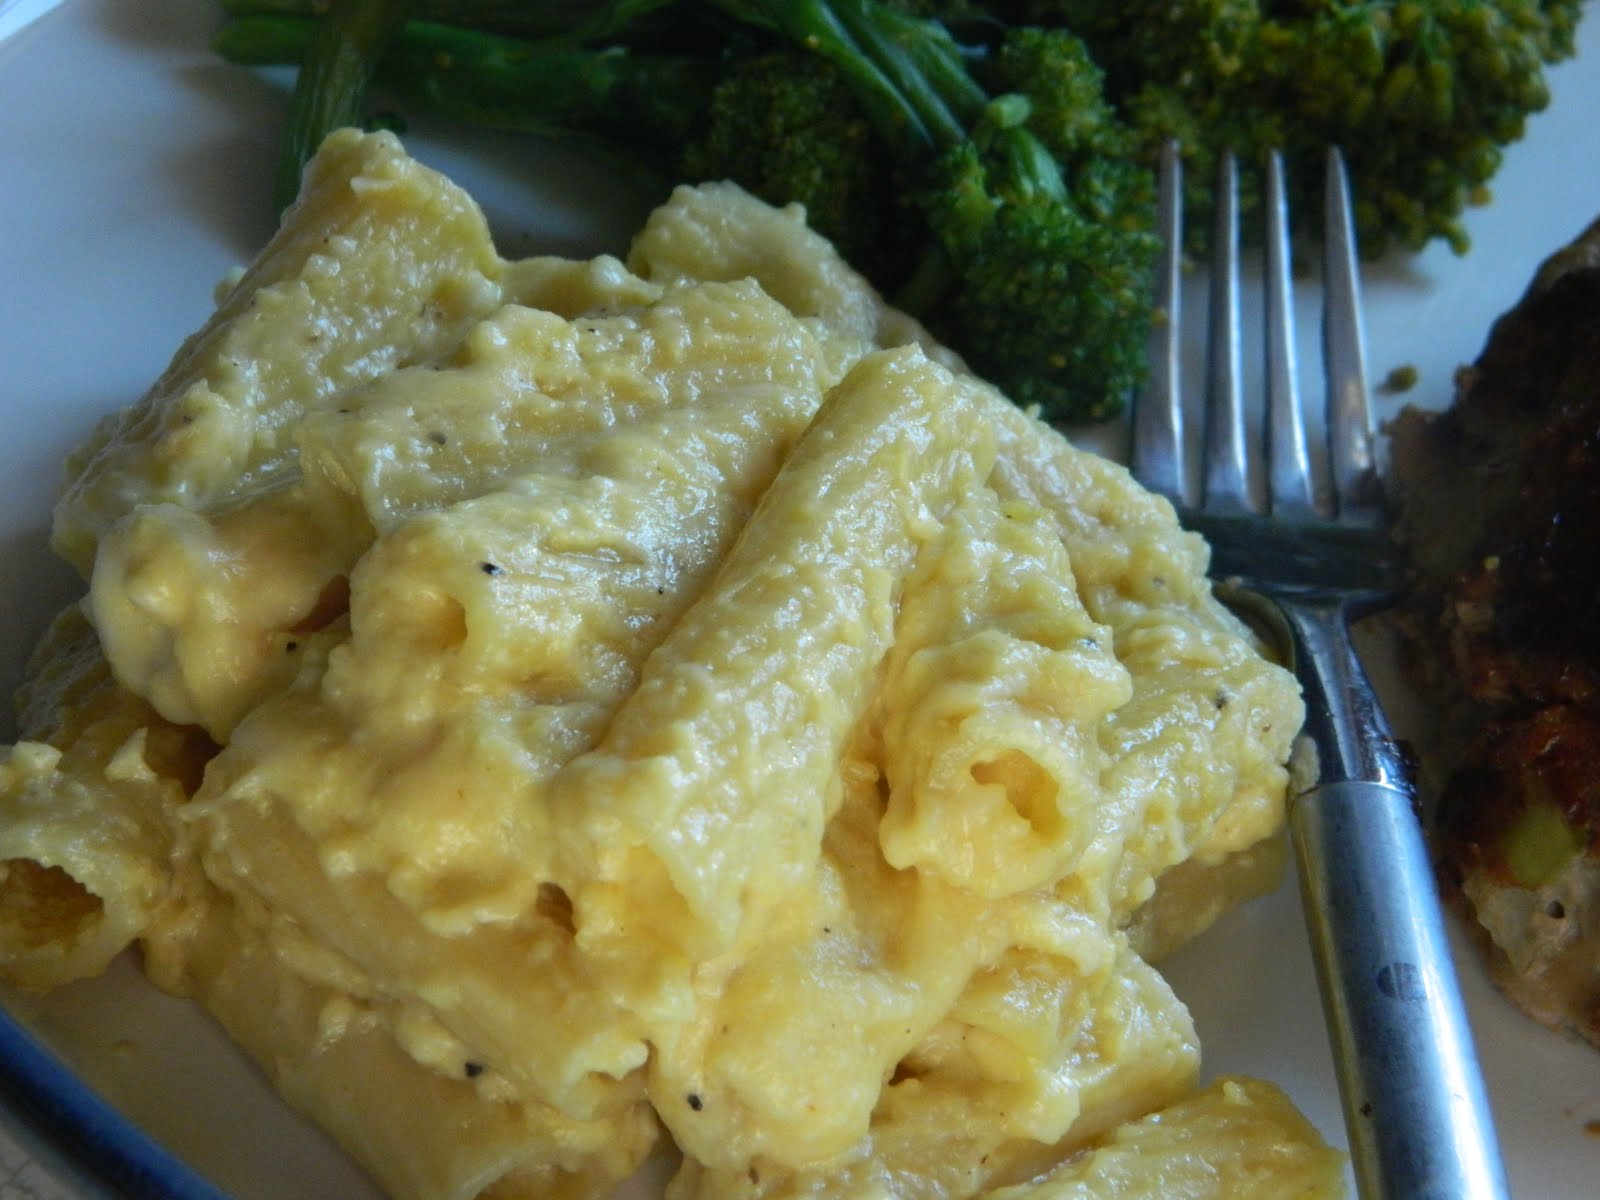
      I know I said healthy recipes until vacation, but I did cook a few indulgences as well.  My theory is all things in moderation.  When I made the BBQ Meatloaf, I'm sure you saw Alton Brown's Stovetop Mac and Cheese that I served as a side. 


      Alton really knows what he is doing here!  This dish is delicious, easy to make and is ready in a fraction of the time it takes to make baked macaroni and cheese.  Plus, you only use one pot!  Usually I'm using 3; the pot to boil pasta, pot to make sauce and a baking dish.  I must warn you though, there is one bad thing about this dish, you will want to make it every week because it is so good and such a cinch to pull together!

      Don't be afraid to use whatever cheese you have on hand.  I've made this several times, using different cheeses, and each time it has come out great.  This time I used leftover cheddar, Dubliner and Monterey Jack cheeses. 

      Here is what you'll need:
      • 1/2 pound elbow macaroni
      • 4 tablespoons butter
      • 2 eggs
      • 6 ounces evaporated milk
      • 1/2 teaspoon hot sauce
      • 1 teaspoon kosher salt
      • Fresh black pepper
      • 3/4 teaspoon dry mustard
      • 10 ounces sharp cheddar, shredded
      In a large pot of salted water, cook pasta until al dente, then drain.  Return pasta to the pot, add butter and melt.  Stir to be sure all pasta is coated.


      In a small bowl, mix together the eggs, milk, hot sauce, salt, pepper, and mustard.  Add to the pasta, stirring well.  Add cheese to the pasta and stir well.

      Turn heat on low and cook pasta for 3 minutes or until the cheese is melted and creamy.  Serves 4.