spoon
Showing posts with label Fruit. Show all posts

Canning: Strawberry Rhubarb Jam

0

Category: , ,

Remember those 7 lbs of strawberries? Ice cream and cake wasn't enough to use them all up, for that matter making jam didn't finish them up either. However, this jam did make a big dent in the remaining berries.

I've been wanting to make jam for awhile, and when Heather suggested Strawberry Rhubarb Jam it was perfect since I had some rhubarb in the freezer. My sister declared this the best jam she has ever eaten (homemade or store bought). If that isn't enough to convince you to try it, I'm not sure what would.

Here's what you'll need:
  • 2 cups whole strawberries, crushed
  • 2 cups rhubarb
  • 1/4 cup lemon juice
  • 6 Tbsp classic pectin
  • 1 tsp cinnamon
  • 5 1/2 cups granulated sugar
To prep jars for canning, heat jars and lids in simmering water until ready for use. Do not boil. Set bands aside.

In a large stainless steel pot, combine strawberries, rhubarb and lemon juice. Whisk in pectin until dissolved.

Bring to a boil over high heat stirring often. Add sugar and cinnamon, and return to a full boil, stirring constantly. Boil hard for 1 minute while stirring.

Remove from heat and skim foam if necessary.

To Can:

Remove hot jars from water. Ladle hot jam into hot jars leaving 1/4 inch headspace. Remove air bubbles by running a sterile knife around the inside of the jar. Wipe rim clean. Center lid on jar. Apply band and tighten until just tight (do not force).

Place jars in boiling water bath making sure water covers jars by at least 1 inch. Process jars in the boiling water bath for 10 minutes. Remove jars from water and set aside to cool.

After 24 hours, remove bands and check lids for seal. Lid should not flex up and down when center is pressed and lids should stay intact when lifting jar by the lid. Store on a cool, dark shelf.

Makes ~ 6 half-pints.
Source: Ball's Blue Book Guide to Preserving as seen on Hezzi-D's Books and Cooks

Strawberry Summer Cake

0

Category: , ,

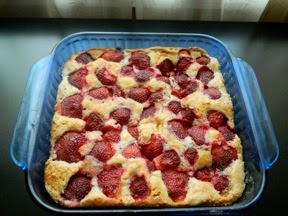
Cake or pie? Given the choice, I always choose pie and pie is what I was looking to make with our strawberries. That was until JR caught wind of my plans. Cake is his preference, and since I knew he'd more than likely be eating the majority of this treat, I went ahead and fulfilled his request.


I was pretty sold on this cake after reading the reviews. It was described as  having a "jammy" top and well, I do love anything strawberry jam! Plus, this was super simple to make which is a bonus in my book!

I'm rethinking my always choose pie decision. We gobbled this cake up at a very fast pace and I'm willing to bet you will too when you make it. It's already on my list of things to make when our short late strawberry season comes around in a few weeks.

Here is what you'll need:
  •  6 Tbsp unsalted butter, softened
  • 1 cup granulated sugar
  • 1 large egg
  • 1/2 cup milk
  • 1/2 tsp almond extract
  • 1 1/2 cup flour
  • 1 1/2 tsp baking powder
  • 1/2 tsp salt
  • 1 1/2 cup strawberries, stemmed and halved 
  • 2 Tbsp granulated sugar
Preheat oven to 350F. Grease 8x8 glass baking dish and set aside.

In the bowl of an electric stand mixer, cream butter and 1 cup sugar until fluffy, approx. 3 minutes. Add the egg, milk and almond extract and beat until well combined.

In a small bowl, combine flour, baking powder and salt. Slowly add dry mixture to wet mixture and beat until well incorporated.

Pour batter into greased baking dish. Place strawberries cut side down on top of batter. Sprinkle with remaining 2 Tbsp sugar.

Place in oven and bake for 10 minutes. Reduce oven temp to 325F and continue baking for 50-60 minutes, until a toothpick insert comes out clean (it may have some strawberry on it, but no wet batter should be visible). Cool on a wire rack before serving. Serves ~ 9.

Source: Slightly adapted from Martha Stewart as seen on Smitten Kitchen

Sweet Cream Strawberry Ice Cream (Lactose Free)

0

Category: , , ,

JR and I went strawberry picking this year for the first time together. There is a very popular place around, and since I imagined it would be packed with people I sought out a smaller local farm that was actually closer to home. I loved driving up and seeing the little hand painted wooden strawberry sign hanging on the side of the road.

Remember I said JR and I went, well, he sort of just directed me while I picked. It was funny when a lady a row over from us asked if he was actually helping or not. I think his idea of helping is the eating part after. This is fine by me because there would be a lot of eating after picking 7 lbs of berries!


I sought out recipes from my cooking board friends because I knew they'd have the best recipes to share. It's funny, one of the ice cream recipes I read stated they were making it for milkshakes, and that is exactly what JR asked for. Besides cake, which will come in another post.

This recipe was an experiment in the sense that I was trying to make it lactose free. I know some people will turn their nose up at using coffee creamer, so go ahead and use real cream instead (as long as you don't care about it being lactose free). Since JR can be a "picky pants", I was going more for flavor over healthy here. Who am I kidding, ice cream isn't exactly healthy to begin with!

My experiment worked for the most part. Why for the most part? Like it's name suggests, this ice cream is sweet, so adding milk for a milkshake helped subdue the sweetness, and the texture lends better to milkshakes vs. eating. While I'd prefer my ice cream straight up, a milkshake works too!

Here is what you'll need:
  • 3 3/4 cups whole strawberries
  • 3 Tbsp agave
  • 1 cup 2% reduced fat lactose free milk
  • 1/2 cup sugar
  • 1/2 vanilla bean, scraped
  • 5 large egg yolks
  • 1 3/4 cup Italian Sweet Cream coffee creamer
  • 2 tsp Kirsch, optional
Place strawberries and agave in a medium pot and cook over medium heat until strawberries are softened and begin to break down. Allow to cool and puree in blender. Set aside.

In a saucepan over medium-low heat, warm milk, sugar and vanilla bean with scrapings. Once warmed, remove from heat.

Whisk egg yolks in another mixing bowl. Slowly add warm milk mixture to egg yolks, whisking constantly. Return mixture to saucepan. Heat saucepan over medium heat, stirring constantly until mixture thickens and coats the back of a spoon.

Pour coffee creamer into a large mixing bowl. Place a mesh strainer over bowl. Pour custard through the strainer.

Make an ice bath of ice and water in another large mixing bowl. Place bowl of custard into the ice bath. Stir custard over ice bath until cooled. Place custard in the refrigerator to chill completely.

Remove custard from refrigerator and stir in Kirsch. Churn the mixture in an ice cream maker according to the manufacturer's instructions. Freeze in an airtight container with a piece of plastic wrap pressed against the ice cream to keep ice crystals from forming.

Source: Adapted from David Lebovitz

Pineapple Cream Puffs

2

Category: , ,

As I previously mentioned, years ago my aunt made a Pineapple Cream Puff which I fondly remember. Since I can't replicate her recipe, I did my best to adapt the Strawberry Cream Puffs. While not the same ones I remember, these were very good.


Here is what you'll need:
  • 1/2 cup pineapple puree (about 1 cup of fresh pineapple)
  • 1/2 cup heavy whipping cream
  • 2 Tbsp confectioners' sugar
  • 8 oz cream cheese
  • 1/3 cup confectioners' sugar
  • 1/2 tsp vanilla extract
  • 2 sheets of puff pastry
  • 1 egg yolk, beaten
  • confectioners' sugar (for sprinkling)
  • pineapple, diced for garnish
Take puff pastry out of freezer and let sit 20 minutes while you make the filling. Preheat oven to 430F. Line 2 baking sheets with parchment paper.

To make the puree, place 1 cup of pineapple in a blender or food processor and pulse until pureed to an almost smooth consistency. Set aside.

To make pineapple cream, in the bowl of a stand mixer, beat heavy cream on high until foamy Add 2 Tbsp confectioners' sugar and beat until stiff peaks form. Transfer to a mixing bowl and set aside.

In the bowl of a stand mixer, beat cream cheese until smooth. Add 1/3 cup confectioner's sugar and vanilla, and beat until smooth. Be sure to scrape down the sides to make sure ingredients are well combined. Add pineapple puree to cream cheese mixture and mix on low until combined. Remove bowl from stand mixer.

Gently fold whipped cream into pineapple cream until combined. Transfer cream to pastry bag with large tip, or alternately use a zip lock bag with corned cut off. Refrigerate until ready to use.

To make pastry, unfold a sheet of puff pastry on wax paper. Cut each sheet into 9 pieces for regular sized cream puffs, or 25 pieces for mini cream puffs.

Transfer cut pastry to parchment lined baking sheet. Brush pastry with egg yolk.

Bake for 11-13 minutes, or until pastry has risen, browned and looks dry. Remove from oven and completely cool on wire racks.

Cut each pastry in half. Pipe ~1/4 cup of cream onto each pastry bottom. Place other half of pastry on top of cream. Sprinkle with confectioners' sugar. Pipe a small dollop of cream on top. Garnish with diced pineapple. Serve immediately.

For mini cream puffs, I baked the puff pastry for 8 minutes. After the puff pastry cooled, I cut a hole in the top of the puff pastry, sprinkled with confectioner's sugar, filled the hole with cream and sprinkled a few pieces of diced pineapple on top of the cream.

Makes 18 cream puffs (shown here) or 50 mini cream puffs (not shown).

Source: Adapted from Glorious Treats

Strawberry Cream Puffs

0

Category: , ,

Continuing on with bite-sized treats theme, Strawberry Cream Puffs came to be on the party menu when I was remembering a cream puff from my childhood. My aunt would make Stella D'oro Anginetti cookies stuffed with a pineapple cream. These showed up at most, if not all, family events and I remember licking every last sugar crumb off my fingers. I knew sister-in-law would love these!


To my disappointment, Stella D'oro discontinued Anginetti cookies. I hear they may be making a come back soon, I certainly hope so! I was determined to make something similar when I found this Strawberry Cream Puffs recipe on Glorious Treats.


The great thing about this recipe is that I was able to make the cream in steps ahead of time, and just bake off the pastry to fill right before leaving for the party. You don't want bake and fill in advance since the pastry doesn't hold up very long (a couple hours at most).

Here is what you'll need:
  • 1/2 cup strawberry puree (about 1 cup of strawberries)
  • 1/2 cup heavy whipping cream
  • 2 Tbsp confectioners' sugar
  • 8 oz cream cheese
  • 1/3 cup confectioners' sugar
  • 1/2 tsp vanilla extract
  • 2 sheets of puff pastry
  • 1 egg yolk, beaten
  • confectioners' sugar (for sprinkling)
  • strawberries, sliced for garnish
Take puff pastry out of freezer and let sit 20 minutes while you make the filling. Preheat oven to 430F. Line 2 baking sheets with parchment paper.

To make the puree, place 1 cup of strawberries in a blender or food processor and pulse until pureed to an almost smooth consistency. Set aside.

To make strawberry cream, in the bowl of a stand mixer, beat heavy cream on high until foamy Add 2 Tbsp confectioners' sugar and beat until stiff peaks form. Transfer to a mixing bowl and set aside.

In the bowl of a stand mixer, beat cream cheese until smooth. Add 1/3 cup confectioner's sugar and vanilla, and beat until smooth. Be sure to scrape down the sides to make sure ingredients are well combined. Add strawberry puree to cream cheese mixture and mix on low until combined. Remove bowl from stand mixer.

Gently fold whipped cream into strawberry cream until combined. Transfer cream to pastry bag with large tip, or alternately use a zip lock bag with corned cut off. Refrigerate until ready to use.

To make pastry, unfold a sheet of puff pastry on wax paper. Cut each sheet into 9 pieces for regular sized cream puffs, or 25 pieces for mini cream puffs.

Transfer cut pastry to parchment lined baking sheet. Brush pastry with egg yolk.

Bake for 11-13 minutes, or until pastry has risen, browned and looks dry. Remove from oven and completely cool on wire racks.

Cut each pastry in half. Pipe ~1/4 cup of cream onto each pastry bottom. Place other half of pastry on top of cream. Sprinkle with confectioners' sugar. Pipe a small dollop of cream on top. Garnish with strawberry slice. Serve immediately.

For mini cream puffs, I baked the puff pastry for 8 minutes. After the puff pastry cooled, I cut a hole in the top of the puff pastry, sprinkled with confectioner's sugar, filled the hole with cream and sprinkled a few pieces of diced strawberries on top of the cream.

Makes 18 cream puffs (shown here) or 50 mini cream puffs (not shown).

Source: Adapted from Glorious Treats

Canning: Cranberry Orange Sauce

1

Category: , ,


Fresh cranberry sauce is somthing I look forward to every year. I love it with our big holiday meals, as well as for breakfast in Greek yogurt and on a English muffin with cream cheese. I've experimented with several cranberry sauces over the years, but this has become my favorite and the one I turn to time and time again. So much so, I decided to make it twice this year in order to give as Christmas gifts and to enjoy throughout the year.


Here is what you'll need:
  • 12 oz. fresh cranberries
  • zest and juice of 1 orange
  • 3/4 cup water
  • 3/4 cup sugar
  • 2 cinnamon sticks
Combine all ingredients in a medium saucepan and bring to a boil. Reduce heat to medium and gently boil for 10 minutes, stirring occasionally.

To Can:

Heat jars and lids in simmering water until ready for use. Do not boil. Set bands aside.

Ladle hot sauce into hot jars leaving 1/4 inch headspace. Remove air bubbles by running a sterile knife around the inside jar. Wipe rim. Center lid on jar. Apply band and tighten until just tight (do not force).

Process jars in a boiling water for 15 minutes. Remove jars and cool. After 24 hours, remove bands and check lids for seal. Lid should not flex up and down when center is pressed and lids should stay intact when lifting jar by the lid.

Makes ~ 3 half-pints.

Source: Recipe adapted from Ocean Spray; Canning method from Ball's Complete Book of Home Preserving

What's Baking: Bake in Season with Spring Produce

6

Category: , , ,

As I mentioned in my last post, this month was my turn to host What's Baking! I was so excited to be hosting at a time when Spring produce is at its finest! Our farmer's markets are starting to open around here and I'm always looking for ways to use the produce we find. At some point I hope to make everything submitted this month, and I hope something in this round-up inspires you to seek out Spring produce at your local farmer's market. There are so many great posts this month!


First up, we have Hezzi-D's Baked Penne with Roasted Vegetables. I love that Heather went with a savory meal option. I cannot wait to see these vegetables show up at the farmer's market!

Next up is Beantown Baker's Raspberry Rhubarb Muffins. Jen's blog is one of my go-to's when I'm looking for baking ideas. 'I see these muffins in my near future, a great way to use of the extra rhubarb I put in the freezer.


Here we have a first time participant, Newlywed and Newly Cooking's Strawberry Rhubarb Crisp with Almond Streusel looks delicious. Joanna also provides us a little comic relief in the form of a kitchen mishap, something I'm sure we can all relate to!


Another first time participant here, Pursuing Domestic Goddess-ness' Savory Cheese and Chive Bread. Catherine was happy to put her chive plant to good use, and gives us a tip on how to prepare fiddleheads.


Just Baked's Brown Sugar Berry Shortcakes takes the traditional shortcakes to another level with the addition of brown sugar.


Next up we have Jenna's Cooking Journey's Blueberry Lemon Loaf from another first time participant. I absolutely love that we have so many new participants this month!


Sweet Beginnings' Pineapple Zucchini Bread is a recipe I've made before. I save shredded zucchini in my freezer every year so I can make it again! Jaida, thanks for the reminder!

We had another blueberry entry from Yudith. Blissfully Delicious' Buttermilk Blueberry Breakfast Cake is an indication to me that it is perfectly fine to eat cake for breakfast!


Eva Bakes' Strawberry Greek Frozen Yogurt reminds us that Spring produce can be enjoyed cold as well!

Strawberries were popular this month as evidenced by Our Share of the Harvest's Strawberry Cupcakes with Buttercream Frosting. I wish Lindsey was able to box them up and ship them to me!


Love the creativity in Melissa's entry. I wonder if I Was Born to Cook's Strawberry "Donut" Bundt Cake could be considered breakfast?!


Another popular choice this month was rhubarb. Stephanie brings us Brownies and Blondies' Berry Rhubarb Pie which she adapted based on the berries currently available (or preserved from previous seasons).


Amanda is lucky enough to have peaches in season! Our Italian Kitchen's Stuffed Baked Peaches look like they would make a simple, yet elegant ending to any special dinner.


Sandra didn't have luck finding anything in season, but she did use local apples. Check out She Cooks and Bakes' Homemade Cranberry Apple Granola.


And lastly, I made Strawberry Rhubarb Dessert Bars


To all the ladies who participated, thank you for making this month's What's Baking a success!

What's Baking: Strawberry Rhubarb Dessert Bars

3

Category: , ,

It's time once again for What's Baking. After participating for over a year, it was finally my time to host! The theme I chose was Bake in Season with Spring Produce. This time of year I am always itching waiting for the farmer's markets to open which inspired the theme. I figured even those who have farmer's markets readily available year round probably look forward to those first signs of Spring.


My original plan was to bake something savory, with asparagus, however, I haven't had luck finding good asparagus recently. My next thought was fiddleheads, but, I don't know, I couldn't bring myself to buy them and didn't really know what to do with them! So I changed completely and settled on something sweet.

While these are sweet, and use those bright red beauties growing in my back yard, they also incorporate the notoriously tart rhubarb. Rhubarb brings back fond childhood memories of picking a stalk from our neighbors plant, dipping it in a Dixie cup of sugar, biting down and feeling that punch in the jaw. 


These don't give you that punch in the jaw, instead the combination of strawberry and rhubarb make for a mellow dessert, reminiscent of a coffee cake. My husband especially loved them. He claimed they tasted like cream cheese, but I assured him there was no cream cheese, I'm pretty sure it was the buttery crumbs mixing with the creamy fruit center. I took these to a Memorial Day picnic and everyone who tried them had positive reviews as well.


Be sure to check back here in a couple of days for this months roundup where you'll see What's Baking in the other participants kitchens.


Here is what you'll need:


For the Filling:

  • 1 1/2 cups fresh or frozen unsweetened rhubarb, cut into 1-inch pieces
  • 1 1/2 cups sliced fresh strawberries
  • 1 tablespoon lemon juice
  • 1/2 cup sugar
  • 2 tablespoons cornstarch
Combine fruit and lemon juice in a small non-reactive saucepan and cook over medium heat for 8-12 minutes, stirring occasionally, until the fruit is soft. 

Combine sugar and cornstarch together in a small bowl. Add to fruit mixture and stir. Bring to a boil and allow to thicken for 1 minute.

Remove from heat and set aside.


For the Crust:

  • 1 1/2 cups all-purpose flour
  • 1 1/2 cups uncooked quick-cooking oats
  • 1 cup firmly packed brown sugar
  • 3/4 cup butter, softened
  • 1/2 teaspoon baking soda
  • 1/4 teaspoon salt
Preheat oven to 350 degrees. Grease a 9 x 13 pan and set aside.

Combine all ingredients in the bowl of a stand mixer. Mix on medium-high until the ingredients are combined and the mixture is crumbly.

Remove 1 1/2 cups of crumb mixture from bowl and set aside.

Pour remaining crumb mixture into greased pan and press into the bottom to form a crust. Pour filling over crust and spread evenly. Sprinkle reserved crumb mixture evenly over the top of the filling.

Bake for 30-35 minutes (mine took 35 minutes). Cool completely before cutting.

Note: The original recipe included a drizzle which I omitted.

Source: Land O Lakes

Strawberry Pancakes with Strawberry Maple Compound Butter

3

Category: , ,

It's recipe swap time! This time the theme is Secret Recipe Club Style, meaning we are given a blog and can choose any recipe from it to make. I was given Lishie's blog, DeLish. It was really early, think 4:45 AM Sunday morning, when I started searching for what I would make. After searching for a while I got hungry and settled on something I could make for breakfast.


As I mentioned last week, strawberries are at a great price right now and I'm still looking for ways to use them up. I settled on these Strawberry Pancakes with Strawberry Pancakes with Strawberry Maple Compound Butter. This was my first experience with compound butter, I added the maple not sure how it would work out. I'm happy to have discovered how easy these are to make. I can see experiments with different flavor combinations in my future.

Here is what you'll need:

For the Pancakes:
  • 1 cup flour
  • 1 Tbsp sugar
  • 2 tsp baking powder
  • 1/4 tsp salt
  • 1 egg
  • 1 cup milk
  • 1/4 sliced strawberries
  • butter (for the pan)
Combine flour, sugar, baking powder, salt in a mixing bowl. Add egg and milk, and whisk together until smooth. Add strawberries and gently stir until combined.

Melt 1/2 Tbsp butter in a small frying pan over medium heat. Pour ~1/2 cup batter into pan and allow to cook about 3-4 minutes, or until the bottom is golden brown and the top is covered in bubbles. Flip the pancake over and cook the second for 2-3 minutes until golden brown. Repeat with remaining batter.

To serve, plate and top with a small dollop of compound butter (recipe below) and maple syrup. Makes 5 pancakes.

For the Butter:
  • 4 Tbsp butter, softened to room temperature
  • 2 Tbsp finely chopped strawberries
  • 2 tsp maple syrup
Combine ingredients in a small food processor. Pulse 15-20 seconds to combine. Transfer to a small bowl and refrigerate to set-up.
    Source: Slightly adapted from Delish

    Cranberry Sauce (All Natural, Sweetened with Agave Nectar)

    0

    Category: , , ,

    Can you believe Thanksgiving is this week?!  I say this every year, but this year really has flown by!  I'm sure you already have your Thanksgiving menu finalized and are knee-deep in prep for the feast.  However, just in case you are still looking for one last side dish, or forgot to pick up the canned cousin, I wanted to share this Cranberry Sauce I made for our Thanksgiving dinner.


    When I first started making Cranberry Sauce, I used a ton of sugar as indicated in most recipes.  After a few years I started using Splenda to save calories, and this year I challenged myself to make it all natural with agave nectar.  I did a quick search and came upon this recipe from Amy Andrews and decided to give it a try.  Not only did it use agave nectar, I was intrigued by it's use of spices.  Speaking of spices, I had no cheesecloth, so I opted to try my tea ball.  It worked.

    This resulted in a less sweet, a little spicy and mighty tasty version of a classic Cranberry Sauce.  Since I'm the only one who eats it, I'm excited to dig into the leftovers mixed in my yogurt and spread on bagels with cream cheese!  If you have ideas for other ways to use up the leftovers, please leave me a comment with your suggestions.
    Here is what you'll need:
    • 1 12 ounce bag fresh, whole cranberries
    • 2/3 cup agave nectar
    • grated peel of 2 clementines
    • 1/3 cup clementine juice
    • 1 cinnamon stick
    • 6 black peppercorns
    • 4 whole cloves
    • 3 whole allspice
    Place cranberries, agave nectar, grated peel, juice and cinnamon stick in a medium nonreactive saucepan.  Stir to combine.

    Place remaining spices in cheesecloth (or a tea ball!), tie the cheesecloth and place in saucepan.

    Bring to a boil over medium-high heat.  Stir, reduce heat to low and allow to simmer 15 minutes, or until cranberries pop and sauce becomes syrupy.

    Remove from heat and remove tea ball.  Allow to cool, then remove cinnamon stick.  Transfer to a bowl, cover and refrigerate until ready to serve.

    Makes 2 cups.

    Source: Amy Andrews: Your Guide to the Food Room

    Eat to the Beat: Breakfast in Bed...Waffles with Caramelized Bananas and Pecans

    2

    Category: , , ,

    Elly from Elly Says Opa! is hosting a blog event called Eat to the Beat for her 5-year blog anniversary.  I was intrigued when I heard about this event and decided to jump in and join.

    I've had Train on repeat for a while now, I'm obsessed, so it what pretty much a no-brainer when I heard "Breakfast in Bed" come on the day following her announcement.  I always eat breakfast, but JR does not.  However, every once in a while we'll have a weekend breakfast and this weekend makes the second one in a row (it has nothing to do with the fact that I pretty much forced this on him)!


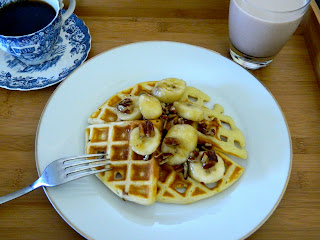
    I was browsing through this Brunch cookbook when I came across Waffles with Caramelized Bananas.  Not only did they look delicious, use ingredients I always have on hand and they make for a special treat, just like a Breakfast in Bed should be!
    Head on over to the round-up and wish Elly a Happy 5 years!  

    Here is what you'll need:
    • 1 1/4 cup all-purpose flour
    • 2 tsp baking powder
    • 1/2 tsp salt
    • 2 tsp superfine sugar
    • 2 eggs, separated
    • 1 cup milk
    • 3 Tbsp butter, melted
    • 3 Tbsp butter
    • 3 Tbsp maple syrup
    • 1/3 cup chopped pecans
    • 3 large ripe bananas, peeled and sliced
    Preheat waffle maker according to manufacturer's instructions.

    In a mixing bowl combine flour, baking powder, salt and sugar.  Make a well in the middle of the dry ingredients and add the egg yolks, milk and butter.  Whisk until smooth.

    Using a mixer, beat egg whites until stiff peaks form.  Fold egg whites into batter.

    Fill your waffle maker according to manufacturer's instructions.  Cook until browned to your liking (mine has a light that goes off when it's done, but then I let it go a little longer to brown more).

    Meanwhile, in a sauce pan over medium heat, heat butter, maple syrup and pecans until butter is melted and mixture begins to turn golden brown.  Remove pan from heat and add bananas.  Stir to coat bananas well.

    Spoon banana pecan syrup over waffles and enjoy!

    This made 4 6-inch round waffles (16 quarters), serves 4-6.

    Berry Iced Tea

    0

    Category: ,

    This Summer was HOT!  I shouldn't complain, because I know the South is experienced (is still experiencing) a brutal heat.  I'm sure they would appreciate sipping on this refreshing Berry Iced Tea.

    I love iced tea and I tend to drink it quite often, especially during Summer.  Usually I buy those little packets that you just mix with water.  You know the ones that are made of mostly chemicals?  Yeah, those.  It's really a matter of convenience for me, because I don't like to consume sugar in my beverages.  So I buy the sugar-free stuff and call it a day.


    It's really a shame that I don't take more time to make brewed iced tea more often, because it's very good and so much better for you than the chemical packets.  I didn't follow a recipe for this, you really don't need one, this is just a starting point and you can adjust to your preference for strength and flavor.

    If you're fortunate enough to freeze berries when they are at their peak, you can make this all year round.  Or, you can buy frozen berries at the store and keep them on hand for when the urge strikes.

    Here is what you'll need:

    • 2 quarts water
    • 8 oz. frozen mixed berries 
    • 5 black tea bags 
    • 3 raspberry herbal tea bags
    • 1/3 cup agave syrup (or more to taste)
    Combine water, mixed berries and tea bags in stock pot.  Heat over medium heat until liquid comes to a simmer.  Turn off heat and allow to set for 5 minutes.  

    Pour mixture through fine mesh strainer into juice container.  Press berries to extract all their juice.

    Add agave to liquid and stir.  Chill before serving.  Serve over ice with a sprig of mint.  Serves 8.

    Source: Adventures In My Kitchen original

    Fig and Arugula Salad

    4

    Category: , , , ,

    This post jumped to the front of the line after our Sunday lunch.  When I can serve my husband a meal with very minimal meat, and he's satisfied, it's cause for celebration!  As we started lunch JR was making comments such as, "this is really good", "I'd eat this again", "these figs are the perfect ripeness".  He never asked, "where's the meat?"  I'm shocked, but I shouldn't be.  I did add just a few very slices of shaved prosciutto to the salads, and that was enough for him.  Lesson learned.


    Since fig season is so short, when I came across this recipe on courant.com last week, it immediately went on our weekly menu plan.  I'm so grateful it did.  I found arugula and a perfect goat milk feta, not too salty, at Sunday's farmer's market.  I was unsure about arugula since I'd never had it before and I'm not generally fond of bitter flavors, however, it worked really well here.

    I served this with a side of toasted baguette (also from the farmer's market), sliced and drizzled with olive oil and the remaining dressing.  This really was the perfect lunch for a blazing hot Sunday.

    Here is what you'll need:
    • 1 bunch arugula
    • 2.5 oz. feta cheese, cubed
    • 4 figs, quartered
    • 4 slices shaved prosciutto 
    • 1/4 cup pecans
    • 1 Tbsp balsamic vinegar
    • 4 Tbsp olive oil
    • 1 Tbsp honey
    • 1/2 tsp sea salt
    In a small frying pan, toast the pecans over medium-high heat.  Be sure you watch them carefully and shake the pan a few times to move them around.  When you begin to smell the nuts, they're done.  Remove them from the heat and allow to cool.  Once cool, chop.

    Arrange arugula, feta, figs, prosciutto and pecans on a plate.

    In a small bowl, add vinegar, olive oil, honey and salt.  Whisk well.  Drizzle over salad.  Serves 2 as a main meal, serves 4 as a side.

    Balsamic Strawberry Coucous Salad

    0

    Category: , , , , ,

    I just love spring and summer salads.  Today I made 3 of them; fruit salad, potato salad and this Balsamic Strawberry Couscous Salad which I found on Prevention RD blog.  I could have happily eaten spinach, strawberry and goat cheese salad for lunches again this week, however, I decided to switch it up which helps keep me from getting bored.


    I made a couple changes to the recipe.  I used black beans, since I had 1/2 a can leftover, and an herbed goat cheese, since I had no fresh herbs on hand.  And since I'm on a spinach kick, that made a perfect bed for this salad.  This is absolutely delicious, and will keep me fueled this week.

    My changes are included here:
    • 1 1/3 water
    • 1/2 tsp olive oil
    • salt to taste
    • 1 cup dry couscous, prepared according to directions
    • 2 cups strawberries, hulled and sliced
    • 1 tsp sugar
    • 3 Tbsp balsamic vinegar
    • 1 Tbsp olive oil
    • 1/2 can black beans, rinsed and drained
    • 2 oz herbed goat cheese, crumbled
    • Baby spinach leaves
    • Scallions for garnish
    Bring water, olive oil and salt to a bowl in a small saucepan.  Add couscous, turn off heat, cover and allow to cook 5 minutes.  Fluff with a fork and set aside to cool.

    Place strawberries in a large mixing bowl, sprinkle with sugar and balsamic vinegar.  Set aside a few minutes, until couscous is cool.

    Add couscous, beans and goat cheese to strawberries, carefully mixing to combine.

    Serve over spinach, which a few snips of scallions for garnish.  Serves 4.

    Spinach, Fruit and Cheese Salad

    0

    Category: , , , ,

    When we get together for holidays, I find a lot of the dishes are heavy and scarce on produce.  I'm always struggling with how to balance my meal.  For Easter this year I decided to bring a lighter dish that would enable me to fill up on something healthy.  Then I could enjoy smaller portions of the other dishes without feeling guilty and overstuffed at the end of the meal.


    I've been on a spinach kick lately, so it's no surprise to me that I ended up making a spinach salad.  I find that mixing spinach with fruit, cheese and nuts ends up feeling decadent, so I thought it would be a great fit for a holiday.  I dressed this with my favorite store bought light balsamic vinaigrette.

    You can use just about any fruit, cheese and nut combination you choose.  Since we have a few allergies, I used the following combination, serving the nuts on the side.  I'd estimate this would serve 4 as a meal and 8 as a side.

    Here is what I used:
    • 1 bag baby spinach, washed
    • 6 oz. blueberries, washed
    • 1/2 cup dried cranberries
    • 3 oz. soft goat cheese, crumbled
    • 1/2 cup sliced almonds, toasted
    • Your favorite balsamic vinaigrette

    What's Baking: Strawberry Shortcake

    0

    Category: , ,

    It's time again for another addition of What's Baking.  This month was hosted by Leanne from The Martin Family blog.  Leanne chose Spring for this month's theme.  I can't wait to see what everyone came up with this month! 

    When I think of Spring, my mind wanders to my garden.  Most of my garden consists of annuals, but I have a few perennials.  The first edible perennials I planted were strawberries, and they are well established now and produce abundantly from late spring to late summer.

    I've made this Strawberry Shortcake by Emeril Lagasse a few times now and it's always well received.  The first time I served this was on a day my sister's bridal party was at my house planning her shower, so whenever I make this is brings back fond memories.

    With Easter coming, I knew this would make a great addition to our family's buffet.  Since this would be consumed by children, I omitted the Grand Marnier and used a sugar-free syrup and juice from an orange instead.  I completely cut out the sugar for the strawberries; 2 cups seemed completely unnecessary, actually ridiculous, to me.  I had every intention of adding orange zest to the cake itself, however, I completely forgot until the batter was in the pan and ready to go in the oven.  Next time!
    The changes I made are included here:

    For the Cake:
    • 1 cup (2 sticks) unsalted butter, melted and slightly cooled, plus 2 tsp, softened
    • 6 large eggs, at room temperature
    • 2 Tbsp milk, at room temperature
    • 1 1/3 cups granulated sugar
    • 2 cups all-purpose flour
    • 2 tsp baking powder
    • 1/4 tsp salt  
    • 4 Tbsp sugar-free raspberry syrup
    • Juice of 1/2 an orange
    For the Strawberries:
    • 3 lbs strawberries, rinsed, hulled, and sliced
    • 2 Tbsp sugar-free raspberry flavored syrup
    • 1 Tbsp agave
    • Zest of 1 orange
    • Juice of 1/4 an orange 
    For the Whipped Cream:
    • 2 cups heavy cream
    • 4 Tbsp confectioners' sugar
    • 1 1/2 tsp vanilla extract
    Preheat oven to 375 degrees.  Grease 9x13 glass baking dish with 2 tsp softened butter.

    Melt 2 sticks of butter and set aside to cool.

    In a stand mixer, beat eggs and milk until they begin to foam.  Add sugar, and beat on high for 7-10 minutes until the mix is thickened and pale yellow.

    Sift flour, baking powder and salt in a medium mixing bowl.  Carefully fold flour mixture into egg mixture until well combined.  Carefully fold melted butter into batter.

    Pour batter into preparing baking dish.  Bake for 30 minutes.  Remove from oven and let cool completely.

    Once cooled, cut into 1 inch cubes and poke holes over top of cake.  Drizzle with 4 Tbsp syrup and  juice from 1/4 of an orange.

    In a large mixing bowl, combine the strawberries, 2 Tbsp syrup, agave, orange zest and juice of 1/2 an orange.  Allow to set 30 minutes or until ready to assemble.

    Just before assembling, use a chilled stand mixer bowl and whip to beat heavy cream and confectioner's sugar on high until stiff peaks form.  Add vanilla and beat until combined.

    In a large serving bowl or trifle bowl, layer 1/2 cake, followed by 1/2 of strawberries.  Repeat with remaining cake and strawberries.  Top with whipped cream and serve immediately.

    Serves 12.  This filled my trifle bowl, plus made the 2 individual bowls you see above.

      Warm Apple Buttermilk Custard Pie

      3

      Category: , , ,

      I remember a few years back having extra buttermilk and looking for recipes to use it up.  I was tired of throwing away perfectly good buttermilk.  It took me a while to figure out there are a number of uses for it: pancakes, waffles, fried chicken, biscuits (which I don't particularly care for), and I've even used it in my macaroni and cheese.  Buttermilk pie was one thing that always seemed strange and unappealing to me.  Pie is my favorite dessert, so I finally decided to give it a try, and boy was I surprised.  It was good, really good!

      Recently I had extra buttermilk and began my search for even more uses.  I thought back to that first buttermilk pie I made, and began searching for other pie variations.  When I came across this recipe I was intrigued; a cross between buttermilk, custard and crumb top apple pies.  I immediately set out to make it!


      I did alter the recipe a bit, cooking the apples in brown sugar vs. regular sugar, and I used an additional apple based on the reviews I read.  I also didn't read through to the end of the recipe, so I added the crumb topping before it baked, instead of allowing to make some and then adding it.  I think the brown sugar was too much because this was VERY sweet, too sweet for me, however, adding the crumb topping early wasn't an issue!

      JR loved it so much he ate two huge pieces before it even fully cooled.  I think this would be well received as a Thanksgiving pie, and may make an appearance on our Thanksgiving table this year.

      The changes I made are included here:

      For Apple Filling 
      • 1/4 cup butter
      • 2 green and 1 red apple, peeled, cored and sliced
      • 1/2 cup sugar (I used brown sugar)
      • 1/2 tsp ground cinnamon
       For Custard:
      • 1/4 cup butter, softened
      • 1 1/3 cups sugar
      • 4 eggs
      • 1 tsp vanilla extract
      • 2 Tbsp all-purpose flour
      • 3/4 cup buttermilk
      For Crumb Topping:
      • 1/4 cup sugar
      • 1/4 cup packed brown sugar
      • 1/2 cup all-purpose flour
      • 1/4 tsp ground cinnamon
      • 3 Tbsp butter
      • 1 pie crust (I used a frozen one)
      Preheat oven to 300 degrees.

      To make Apple Filling: In a skillet over medium meeat, melt 1/4 cup butter.  Add apples, 1/2 cup sugar, and 1/2 teaspoon cinnamon.  Cook 3 to 5 minutes, until tender.  Set aside.

      To make Custard: In the bowl of a stand mixer, combine 1/4 cup softened butter and 1 1/3 cups sugar, and beat until creamy.  Add eggs one at a time, beating until they are no longer yellow.  Add vanilla and 2 Tbsp flour, and combine well.  Pour in buttermilk and beat until smooth.  Set aside.

      To make Crumb Topping: Combine 1/4 cup sugar, 1/4 brown sugar, 1/2 cup flour, and 1/4 tsp cinnamon in a small bowl.  Cut in 3 Tbsp butter or margarine until mixture is crumbly.

      Spoon Apple Filling into pie crust.  Pour Custard over Apple Filling.  Top Custard with Crumb Topping.

      Place in preheated oven and bake for 70 to 80 minutes, until a knife inserted in center comes out clean. Let stand 1 hour before serving.  Serves 8.

      What's Baking: Mixed Berry Cobbler with Cornmeal Crust

      1

      Category: , , , ,

      I recently joined What's Baking, a group of women who bake once a month based on a theme chosen by one of the group members. February's theme is Baked with Love which was chosen by Dunne' of With a Cherry on Top. I know a lot of you are thinking this was a Valentine's theme, but I decided to go another direction with it.

      You see, there is a special woman in my life who happens to have a birthday in February. I met her about 6.5 years ago, but I don't think I realized how much my heart grew for her until about 2 years ago. That was when I realized how important it was for me to have her stand up in our wedding, and today I am happy to call her my sister-in-law.

      Unfortunately, last year the unthinkable happened. She was diagnosed with breast cancer, and it absolutely broke my heart. I never let her see it, but there were many times I cried and worried for her, her husband, her children and her grandchildren. While her diagnosis is that this is treatable, and beatable, it still broke my heart to know the amount of pain and life changes she would go through, and is going through. But she is tough, and boy has she proven it through the last 9 months. 


      However, one of the life changes for her means she was diagnosed with diabetes during her treatment.  So as much as I know she would love a sugar laden birthday dessert, I wanted to give her something that she could enjoy guilt-free.  So here is the Mixed Berry Cobbler I decided on, which was Baked with Love in celebration of her birthday and life!
      You can check out this month's recipe roundup here.

      I followed the recipe pretty close to how it is written.  I was told the filling was nice and tart, and the biscuits were buttery!

      For the filling:
      • 2 Tbsp SPLENDA® Sugar Blend
      • 2 Tbsp cornstarch
      • 30 oz. frozen mixed berries, thawed
      For the crust:
      • 1 cup all-purpose flour
      • ½ cup stone-ground cornmeal
      • 2 Tbsp SPLENDA® Sugar Blend
      • 1½ tsp baking powder
      • ½ tsp salt
      • ¼ cup cold butter, cut into chunks
      • ¾ cup fat-free buttermilk
      Preheat oven to 350 degrees. Spray an 8 x 8-inch baking dish with cooking spray. Set aside.

      For the berries: 
      In a mixing bowl, combine SPLENDA® Sugar Blend and cornstarch.  Add berries, including their juice.  Gently stir to combine. Pour into prepared baking dish.

      For the crust:
      In a small bowl, combine flour, cornmeal, SPLENDA® Sugar Blend, baking powder, and salt. Stir with a fork. Add butter and cut  into dry ingredients until pieces are pea-sized. Add buttermilk and stir until just moistened.  Drop crust batter over fruit.

      Bake 40 to 45 minutes, or until topping is golden and fruit is bubbling. Let stand 20 to 30 minutes before serving to allow sauce to thicken.  Serves 9.

      Peach French Toast Bake

      0

      Category: , , , , ,

      I knew our weekend was going to be jammed packed, so I wanted to be sure we started our days off with a good breakfast.  JR suggested we stop for breakfast on our way out of town, but I really wanted to eat at home since I knew we'd be eating lunch out.  I remembered making overnight french toast before and decided that would be a perfect start to our day!


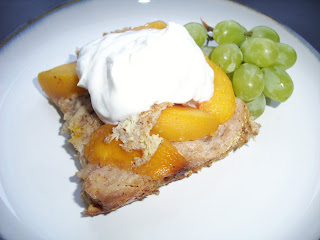
      Ellie Krieger's Peach French Toast Bake is both easy to put together the night before and healthy.  I've made this with other fruits, and it has always come out delicious! And bonus, I now have breakfast ready, with just a little warming needed, for a few work days this week!  This is one of the most filling breakfasts I've eaten in a while. I'm finding a serving of this with 1/3 cup plain greek yogurt keeps me satisfied until lunch.

      I noted the changes I made to the recipe here:
      • Cooking spray
      • 1 large whole-wheat baguette, about 8 oz (I used 8 oz day old ciabatta)
      • 4 whole eggs
      • 4 egg whites (I used 3/4 cup egg whites from the carton)
      • 1 cup low fat milk(I use 15)
      • 1 tsp vanilla extract
      • 5 cups sliced peaches, fresh or frozen
      • 1/2 lemon, juiced about 1 1/2 Tbsp
      • 3 Tbsp brown sugar (I used 4 Tbsp)
      • 1/4 tsp ground cinnamon (I used 1/2 tsp)
      Spray a 9x13 baking pan with cooking spray. Slice the baguette into 1/2-inch slices and arrange the slices in a single layer in the baking pan.  Whisk together the eggs, egg whites, milk, vanilla and cinnamon. Pour the egg mixture over the bread in the pan.

      In a medium bowl, toss peaches with the lemon juice and 1 tablespoon of the brown sugar. Scatter the peach slices evenly on top of the bread. Sprinkle the remaining brown sugar over the top. Cover and refrigerate overnight.

      Preheat the oven to 350 degrees. Uncover and bake for 40 minutes.  Serves 8.